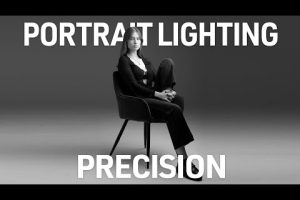
Lamps photography has emerged as one of the most versatile and accessible branches of portrait and still-life imaging. Whether you are using a single desk lamp to create moody, cinematic portraits or orchestrating an elaborate home studio setup with multiple continuous light sources, the art of shooting with lamps opens up creative possibilities that strobes and flash units simply cannot replicate. Unlike traditional flash photography, which delivers a burst of light that is difficult to modify in real time, lamp-based photography relies on continuous illumination. This gives photographers the unique ability to see exactly how light falls on their subject before the shutter clicks, making it an ideal practice for beginners and seasoned professionals alike.
In this comprehensive guide, we will explore every facet of lamps photography — from the essential equipment you need and the techniques that elevate your work, to camera settings, advanced styling tips, and frequently asked questions that address real-world challenges. By the end, you will have a thorough understanding of how to harness lamp light to produce images that are rich in texture, depth, and emotion.
Understanding Lamps Photography: What It Is and Why It Matters
At its core, lamps photography refers to the practice of using artificial light sources — specifically lamps — as the primary or supplementary means of illuminating a scene. This encompasses everything from inexpensive household lamps and LED desk lights to professional-grade continuous studio lighting systems. The defining characteristic is that the light source remains on throughout the shooting process, allowing the photographer and subject to observe lighting changes in real time.
This approach is fundamentally different from flash photography. With flash, you are essentially working blind — the light fires for a fraction of a millisecond, and you must rely on test shots and experience to predict results. Lamps photography removes that guesswork entirely. You can move a lamp closer or farther, adjust its angle, add modifiers, and immediately see the effect on your subject. This real-time feedback loop accelerates the learning curve dramatically.
Lamp-based lighting also lends itself to a particular aesthetic quality. The softness and warmth of continuous light sources tend to produce gentle shadows, gradual tonal transitions, and a naturalistic glow that many photographers and clients find more flattering than the harsh, high-contrast look often associated with direct flash. Whether your goal is editorial portraiture, product photography, atmospheric still life, or moody lifestyle imagery, lamps photography provides the tools to craft that vision with precision.
Essential Lighting Equipment for Lamps Photography
Before diving into techniques, it helps to understand the range of equipment available for lamp-based photography. The right tools can transform an ordinary setup into a professional-grade lighting rig.
Types of Photographic Lamps
The market offers several categories of lamps suited for photography. Choosing the right one depends on your budget, shooting environment, and creative goals.
- LED Panel Lights: Lightweight, energy-efficient, and available in adjustable color temperatures, LED panels are the most popular choice for modern lamps photography. Brands like Aputure, Godox, and Neewer offer options ranging from budget-friendly to professional-grade.
- Tungsten Filament Lamps: These classic warm-light bulbs produce a rich, golden tone that is particularly flattering for portrait work. They are inexpensive but generate significant heat, which can be uncomfortable for subjects during longer sessions.
- Fluorescent Lamps (CFL): Once a staple in budget studio setups, fluorescent tubes offer cool operating temperatures and even light distribution. However, they can sometimes produce a slight green cast that requires white balance correction.
- Smart Bulbs and RGB Lamps: Wi-Fi-enabled lamps from brands like Philips Hue or LIFX allow you to control color, brightness, and even create dynamic color transitions — opening up entirely new creative directions in lamps photography.
- Professional Continuous Studio Lights: These are purpose-built units with built-in dimmers, fanless designs, and high color rendering indices (CRI). They are the gold standard for serious lamp-based work.
Key Accessories for Controlling Lamp Light
Lamps alone will not produce professional results without the right modifiers and accessories.
- Softboxes and Diffusers: These attach to or surround your lamp to soften the light, reducing harsh shadows and creating a more flattering illumination on skin and surfaces.
- Barn Doors: Metal flaps that attach to the lamp housing, allowing you to shape and direct the beam of light precisely where you want it.
- Reflectors and Snoots: A reflector bounces light to fill in shadows, while a snoot narrows the beam for dramatic, focused lighting effects.
- Gels and Color Filters: Colored filters placed over the lamp add mood and atmosphere, enabling you to shift the color temperature or introduce creative tints.
- Light Stands and Clamps: Stable, adjustable stands are essential for positioning lamps at precise heights and angles during a shoot.

Techniques That Transform Lamps Photography

Having the right equipment is only half the equation. The techniques you apply determine whether your images look flat and uninspired or deeply compelling.
Light Positioning and Angles
The position of your lamp relative to the subject is the single most important variable in lamps photography. A lamp placed directly in front of the subject produces flat, even illumination with minimal shadow — useful for product photography but often lacking in drama for portraits. Moving the lamp to the side creates dimensionality and depth, sculpting the subject with highlights and shadows.
The classic “Rembrandt lighting” setup, where the key lamp is positioned at approximately 45 degrees to the side and slightly above eye level, remains one of the most universally flattering configurations in lamps photography. For a more dramatic, editorial look, try positioning the lamp low and to the side, casting long shadows across the face. For a soft, dreamy aesthetic, place the lamp directly behind the subject and use a reflector in front to catch a gentle rim of light along the edges of the hair and shoulders.
Color Temperature and Mood
Color temperature, measured in Kelvin (K), plays a crucial role in setting the mood of a lamps photography session. Warm tungsten lamps at around 2700K produce a cozy, intimate atmosphere, while daylight-balanced LEDs at 5500K–6500K deliver a clean, crisp look. Mixing different color temperatures in a single scene can create visually complex and interesting compositions, but it requires careful white balance management to avoid unwanted color casts.
Many photographers intentionally use mixed lighting — combining a warm household lamp with a cool-toned LED panel — to create tension and visual interest in their images. This approach is increasingly popular in editorial and fine-art lamps photography.
Camera Settings for Shooting with Lamps
Because continuous lamps do not produce the intense burst of light that a flash does, your camera settings need to be adjusted accordingly. Here is a practical framework for dialing in your exposure:
- Aperture: Start at f/2.8 to f/4 for portraits to achieve a shallow depth of field and beautiful background separation. For product work, stop down to f/8 or f/11 for maximum sharpness across the frame.
- Shutter Speed: With continuous light, you can use slower shutter speeds than you would with flash. A starting point of 1/60s to 1/125s is typical. However, be mindful of motion blur if your subject is moving.
- ISO: Keep ISO as low as possible (100–400) to maintain image quality and minimize noise. Only increase ISO when the lamp output is insufficient and you cannot add more light or open the aperture further.
- White Balance: Set a custom white balance or shoot in RAW to retain full flexibility during post-processing. This is especially important in lamps photography because different lamp types emit different color temperatures.
Beginner vs. Advanced Lamps Photography: A Comparison
| Aspect | Beginner Level | Advanced Level |
| Equipment | Single household lamp, no modifiers | Multiple LED panels, softboxes, gels, and light stands |
| Lighting Setup | Lamp placed on a table or shelf next to the subject | Three-point lighting rigs with key, fill, and accent lamps |
| Subject Control | Natural poses, minimal direction | Precise posing, deliberate shadow placement, and directional lighting |
| Post-Processing | Basic exposure and white balance correction | Advanced color grading, frequency separation, and compositing |
| Creative Output | Simple portraits with soft, even light | Cinematic, editorial-quality images with complex lighting narratives |
| Typical Time per Shot | 5–15 minutes of setup and experimentation | 30–60 minutes of deliberate lighting design and refinement |
The transition from beginner to advanced in lamps photography is not about purchasing expensive gear — it is about developing an eye for how light interacts with form, texture, and color. Even with a single $20 desk lamp, you can produce striking images by mastering positioning, diffusion, and shadow control.
Expert Tips for Stunning Lamp-Lit Images
Drawing from years of professional experience, here are several expert-level recommendations that will immediately improve your lamps photography:
- Shoot in RAW format. Continuous lamps photography often involves tricky white balance scenarios, and RAW files give you the latitude to correct color temperature without degrading image quality.
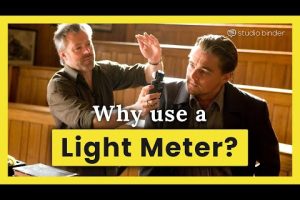
- Use a light meter or your camera’s histogram. Continuous light makes it easy to overexpose highlights. Monitor your histogram closely and use a handheld light meter for precise readings when consistency matters.
- Experiment with distance. The inverse square law governs how light intensity drops off with distance. Moving a lamp even a few inches closer or farther can dramatically change the ratio of light to shadow on your subject.
- Add a second lamp as a fill light. A weaker lamp positioned on the opposite side of your key light softens shadows and creates a more balanced exposure — a technique used extensively in professional portrait and product photography.
- Embrace imperfections. Some of the most captivating lamps photography embraces the natural fall-off and warmth of imperfect light. Do not over-modify every shadow; let the character of the light source contribute to the image’s authenticity.
- Consider the background. Lamps cast light not only on your subject but also on the surrounding environment. Use this to your advantage by incorporating foreground and background elements that interact with the light, adding depth and context to your composition.
Frequently Asked Questions (FAQs)
What is the best type of lamp for photography beginners?
A simple LED panel light or a daylight-balanced LED bulb in a standard household lamp socket is the best starting point. These are affordable, readily available, and do not generate excessive heat. Look for bulbs with a CRI (Color Rendering Index) of 90 or above for accurate color reproduction.
Can I use regular household lamps for professional photography?
Absolutely. Many celebrated photographers have produced stunning work using nothing more than a desk lamp, a floor lamp, and a window blind for diffusion. The key is understanding how to position the lamp, modify the light, and manage white balance — skills that transfer directly to professional workflows.
How do I avoid harsh shadows when using a single lamp?
Diffusion is your best friend. Place a translucent white fabric, parchment paper, or a professional diffuser panel between the lamp and your subject. This scatters the light and transforms a harsh point source into a soft, wrap-around glow that minimizes unattractive shadows.
What camera settings work best for lamp photography at night?
At night, you will likely need a wider aperture (f/1.8–f/2.8), a moderate ISO (800–1600), and a shutter speed of around 1/60s. Using a tripod allows you to shoot at even slower shutter speeds if needed, giving you more flexibility with aperture and ISO for cleaner images.
How does lamp photography compare to flash photography for portraits?
Flash photography freezes motion and delivers high-intensity light, making it ideal for action or outdoor fill. Lamps photography, on the other hand, provides a continuous, observable light that is far more intuitive for beginners and better suited for intimate, atmospheric portraits where the quality of light and the interplay of shadow are paramount.
Is lamps photography suitable for product photography?
Yes, and it is one of the most common applications. Continuous lamps allow you to see reflections on glossy surfaces, adjust highlights on product edges, and fine-tune the lighting in real time — all of which are critical for achieving polished, commercial-quality product images.
Conclusion
Lamps photography is far more than a budget alternative to professional studio lighting. It is a creative discipline in its own right — one that rewards patience, experimentation, and a deep understanding of how light shapes the visual world. From the simplest household lamp to a sophisticated multi-source continuous lighting setup, the principles remain the same: position thoughtfully, diffuse intentionally, and let the light tell the story. Whether you are capturing your first portrait with a single desk lamp or crafting a complex still-life composition with precision-engineered LED panels, the journey of mastering lamps photography is one of the most rewarding paths any photographer can pursue.