Understanding the different kinds of lighting in photography is one of the most transformative skills you can develop as a photographer. Whether you are capturing portraits on location, shooting products in a studio, or documenting events in unpredictable environments, the way you shape light directly determines the mood, depth, and quality of every image you create. Light is not just illumination — it is a creative language that photographers use to tell stories, emphasize texture, and guide the viewer’s eye through a frame. In this comprehensive guide, we will explore every major category of photographic lighting, from natural light sources to advanced studio setups, giving you practical knowledge you can apply immediately regardless of your skill level.
Why Lighting Matters More Than Camera Settings
Many beginner photographers obsess over megapixels, lens choices, and post-processing workflows, but experienced professionals know that lighting is the single most important variable in creating compelling images. No amount of editing can fully rescue a poorly lit photograph. The direction, intensity, color temperature, and quality of light define how shadows fall, how skin tones render, and how textures come alive. Learning to recognize and control light transforms your photography from snapshot-level work into intentional artistry that stands out in any portfolio.
Natural Lighting in Photography
Natural light — also called available light — refers to any illumination that comes from the sun or ambient environmental sources without artificial modification. Mastering natural light is essential because it is free, ubiquitous, and endlessly variable depending on weather, time of day, and geographic location.
Golden Hour and Blue Hour Lighting
The golden hour occurs during the first hour after sunrise and the last hour before sunset, when the sun sits low on the horizon and produces warm, soft, diffused light with long shadows. Blue hour happens just before sunrise and after sunset, casting a cool, twilight hue across the scene. Both windows are prized by landscape photographers, wedding photographers, and portrait shooters because they eliminate harsh shadows and produce rich, cinematic color palettes.
Overcast and Diffused Light
Cloudy days act as a massive natural softbox, scattering sunlight evenly across your subject. This diffused light minimizes hard shadows and highlights, making it ideal for portrait photography and product shoots. Many studio photographers actually seek overcast conditions for outdoor sessions precisely because the cloud cover creates a wrapping quality of light that flatters skin tones and reduces the need for reflectors or fill cards.
Harsh Midday Sun
Direct overhead sunlight around noon creates strong contrast, deep shadows, and squinting subjects — conditions most photographers try to avoid. However, experienced shooters use harsh midday light creatively for dramatic shadow patterns, high-contrast street photography, and backlit silhouettes. Using a flag or negative fill can help control stray light when working in these conditions.
Artificial Lighting in Photography
Artificial lighting gives photographers complete control over intensity, direction, color, and quality regardless of the time of day or environment. There are several distinct categories of artificial light sources, each serving different purposes and skill levels.
Studio Strobes and Continuous Lighting
Studio strobes are powerful, short-duration flash units designed for controlled environments. They produce a burst of light powerful enough to freeze motion and illuminate large scenes. Continuous lights, including LED panels and tungsten floods, emit a constant beam that lets you preview shadows and highlights in real time — making them exceptionally beginner-friendly for learning light placement.
Flash Units and Speedlights
Speedlights are portable, hot-shoe-mounted flash units that offer mobility and versatility. They are staples for event photography, photojournalism, and off-camera portrait work. Modern speedlights feature adjustable power output, tilt and swivel heads for bounce shooting, and high-speed sync capabilities that allow shutter speeds beyond the typical flash sync limit.
Light Modifiers and Their Role
No lighting discussion is complete without mentioning modifiers. Umbrellas, softboxes, beauty dishes, grids, and snoots all reshape how light behaves. A softbox creates soft, directional light perfect for portraits, while a bare flash head produces hard, contrasty light with sharp shadow edges. Understanding which modifier to use and when is what separates a competent photographer from a true lighting expert.
Hard Light vs Soft Light
The quality of light — hard or soft — is one of the most critical concepts in photography. Hard light comes from a small, concentrated source relative to your subject, producing sharp-edged shadows and high contrast. Soft light originates from a larger source or is diffused, wrapping around subjects and creating gradual shadow transitions. The table below summarizes the key differences.
| Characteristic | Hard Light | Soft Light |
| Shadow Edges | Sharp, well-defined | Gradual, feathered |
| Contrast Level | High contrast | Low to moderate contrast |
| Best For | Dramatic portraits, texture emphasis, street | Portraits, beauty, product, weddings |
| Source Size | Small relative to subject | Large relative to subject |
| Common Sources | Direct sun, bare bulb, small speedlight | Cloud cover, large softbox, umbrella |

Light Direction and Its Creative Impact
The direction from which light hits your subject fundamentally changes the visual character of an image. Photographers use specific terms to describe these positions, and each one creates a distinct emotional and visual effect.
- Front Lighting — Illuminates the subject face-on, minimizing shadows and producing a flat, even look. Useful for product photography and passport-style portraits.
- Rembrandt Lighting — Positioned at a 45-degree angle above and to the side, creating the signature triangle of light on the shadow-side cheek. A classic portrait lighting pattern named after the Dutch master.
- Butterfly Lighting — Placed directly above the camera and slightly in front, casting a butterfly-shaped shadow beneath the nose. Popular in fashion and beauty photography.
- Rim Lighting (Backlighting) — Positioned behind the subject, creating a glowing edge or outline that separates the subject from the background. Excellent for dramatic silhouettes and hair-light separation.
- Side Lighting — Illuminates from the left or right at a 90-degree angle, producing dramatic contrast with one side of the face or object in shadow. Ideal for moody, cinematic work.

Practical Lighting Setups by Photography Genre
Different genres demand different lighting approaches. Below are expert-recommended setups tailored to popular photography styles.
- Portrait Photography: Start with a single strobe or continuous light at 45 degrees, paired with a large softbox or umbrella for soft, flattering illumination. Add a reflector on the opposite side for subtle fill.
- Product Photography: Use two to three continuous LED panels positioned to highlight textures and eliminate unwanted reflections. Diffusion sheets and negative fill cards help control contrast precisely.
- Wedding and Event Photography: Rely on off-camera speedlights bounced off ceilings or walls for natural-looking fill. A single external flash on a wireless trigger system gives you enough flexibility to handle reception and ceremony lighting seamlessly.
- Landscape Photography: Work almost exclusively with natural light during golden or blue hour. A graduated neutral density filter can help balance bright skies with darker foregrounds without introducing artificial sources.
- Street Photography: Embrace available light and high ISO techniques. Use reflective surfaces, window light, and neon signs as creative light sources to add color and atmosphere to candid frames.
Color Temperature and White Balance Considerations
Every light source carries a color temperature measured in Kelvin (K). Tungsten bulbs emit warm orange light around 3200K, daylight-balanced strobes sit at approximately 5500K, and shaded outdoor light can push toward 7000K and beyond. Setting the correct white balance ensures that whites appear neutral and skin tones look natural. Shooting in RAW format gives you full flexibility to adjust color temperature during post-production without degrading image quality.
Expert Tips for Improving Your Lighting Skills
Here are practical recommendations from experienced photographers to accelerate your lighting knowledge:
- Start with one light source. Do not try to build an elaborate multi-light setup before you understand how a single light behaves on your subject. Master the basics first.
- Study natural light obsessively. Spend time observing how sunlight moves through a room or across a landscape throughout the day. Understanding natural light trains your eye for artificial work.
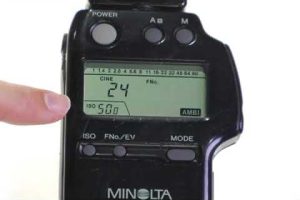
- Use a light meter or histogram. Relying solely on your camera’s LCD screen can be misleading. A handheld incident meter or even your histogram gives accurate exposure readings.
- Experiment with DIY modifiers. Foam boards, shower curtains, parchment paper, and aluminum foil can serve as effective bounce cards, diffusers, and reflectors while you build a professional modifier collection.
- Shoot tethered whenever possible. Viewing your images on a larger monitor in real time helps you see subtle lighting issues that a camera screen might hide.
Conclusion
The kinds of lighting in photography encompass a vast and rewarding spectrum — from the simplicity of a window at golden hour to the precision of a multi-strobe studio configuration. Every photographer, regardless of their niche, benefits from developing a deep understanding of how light behaves, how to modify it, and how to use it intentionally. The journey from natural light beginner to confident artificial light practitioner is built on consistent practice, observation, and a willingness to experiment. Invest your time in studying light, and you will see immediate improvements not only in technical quality but also in the emotional impact and storytelling power of your images.
Frequently Asked Questions
What are the three main types of lighting used in photography?
The three fundamental categories are natural lighting, which relies on sunlight and ambient conditions; artificial lighting, which includes strobes, speedlights, and continuous LED sources; and mixed lighting, which combines natural and artificial elements in a single scene. Each type offers different levels of control and creative flexibility.
How do I choose between hard light and soft light for portraits?
Soft light is generally preferred for most portrait work because it wraps gently around the face, minimizes skin imperfections, and produces flattering shadow transitions. Hard light works best when you want to emphasize texture, create dramatic mood, or highlight strong facial features. The choice ultimately depends on the emotional tone and aesthetic you are trying to achieve.
What is the best lighting setup for beginner photographers?
Beginners should start with a single continuous LED light or a basic speedlight and a white umbrella or softbox. This setup is affordable, portable, and easy to understand because you can see the light in real time. Practicing with one light teaches you about direction, distance, and modifier choices before adding complexity.
Can you use natural light effectively for product photography?
Absolutely. Many product photographers prefer window light combined with diffusion panels and negative fill cards because it produces clean, realistic renders without the harsh reflections that artificial strobes sometimes create. The key is controlling the direction and intensity of the available light using reflectors and flags.
Why does color temperature matter in lighting setups?
Color temperature affects the overall mood and accuracy of your images. Mixing light sources with different Kelvin values — such as warm tungsten and cool daylight — creates color casts that are difficult to correct in post-production. Consistent color temperature across all sources ensures natural, true-to-life color reproduction in every frame.