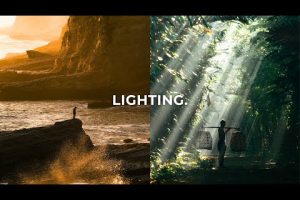
Hair light photography is one of the most transformative techniques in portrait lighting, yet it remains one of the most underutilized tools in both amateur and professional photographers’ arsenals. If you have ever wondered how seasoned photographers achieve that luminous, dimensional glow around a subject’s hair that makes portraits pop off the background, you are looking at the magic of a properly placed hair light. Also known as a rim light or backlight, a hair light serves a singular but powerful purpose: it separates the subject from the background and adds a striking visual halo that draws the viewer’s eye directly to the focal point. Whether you are shooting headshots in a studio, editorial fashion on location, or creative portraits at home, mastering the hair light setup will elevate your work from flat and forgettable to cinematic and compelling. This guide covers everything from the fundamentals to advanced techniques, equipping you with actionable knowledge you can apply on your very next shoot.
What Is Hair Light Photography?
A hair light is a dedicated light source positioned behind or behind-and-slightly-to-the-side of the subject, aimed at the top of the head and shoulders. Its primary role is to create a thin rim of illumination along the subject’s hair, creating separation from the background and adding a three-dimensional quality to the image. Unlike key lights or fill lights, which illuminate the face and body directly, the hair light works exclusively on the outer edges. This technique is foundational in studio portraiture, fashion photography, and wedding photography, where subjects often stand against dark or neutral backdrops. The subtle glow it produces prevents the subject from visually merging into the background, a common problem that even experienced photographers encounter when lighting is not carefully controlled.
Why Hair Lights Matter in Portrait Photography

The impact of a hair light on a portrait cannot be overstated. Here is why this single light source deserves a permanent spot in your lighting setup:
- Visual separation: A hair light creates a bright edge that distinguishes the subject from the background, especially in low-key or dark-environment portraits.
- Depth and dimension: By lighting only the outer contours, a hair light adds a sense of depth that flat, front-facing lighting setups simply cannot achieve.
- Professional polish: Commercial and editorial photographers rely on rim lighting to give portraits a high-end, magazine-quality finish.
- Attention direction: The illuminated hair edge naturally guides the viewer’s gaze toward the subject’s face, reinforcing the composition.
- Background control: When shooting against busy or colorful backgrounds, a hair light ensures the subject remains the undeniable focal point.
How to Set Up a Hair Light for Beginners
If you are new to studio lighting, setting up a hair light is one of the simplest ways to dramatically improve your portraits. Follow these steps to get started.
Step 1: Position the Light Behind the Subject
Place your light source directly behind the subject or at roughly a 30- to 45-degree angle from center, elevated above the subject’s head so it points downward toward the crown of the hair. The exact angle depends on the effect you want: a centered position creates an even rim all around the head, while an offset position produces a more dramatic, one-sided highlight.
Step 2: Choose the Right Modifier
A bare strobe or speedlight will create a harsh, narrow beam that can look unnatural. Instead, consider using a small softbox, a grid modifier, or a snoot to control the spread of light. A narrow grid is particularly effective because it keeps the light focused on the hair and shoulders while preventing spill from reaching the face or the background.
Step 3: Power the Light Appropriately
Start with the hair light at roughly one to two stops brighter than your key light and adjust from there. The goal is a visible but not overpowering rim. If the light is too intense, it will blow out highlights on the hair and look unnatural. Use your camera’s histogram or the highlights warning on your LCD screen to monitor for clipping.
Step 4: Flag or Negative Fill if Necessary
If light is spilling onto the background or the subject’s ears and face, use black flags or gobos to block unwanted light. Controlling spill is essential for maintaining a clean, professional look.
Hair Light vs. Other Portrait Lighting Setups
Understanding how a hair light compares to other common lighting configurations helps you make informed decisions on set. The table below breaks down the differences.
| Setup | Best For | Separation | Complexity | Dimensional Look |
| Hair Light Only | Dark or solid-color backgrounds | High | Low | Moderate |
| Key + Fill + Hair Light | Professional headshots | Very High | Medium | Excellent |
| Rembrandt Lighting | Dramatic artistic portraits | Low to Moderate | Medium | Strong shadows |
| Butterfly Lighting | Beauty and fashion | Low | Low | Flat to moderate |
| Split Lighting | Moody, editorial work | Low | Low | High contrast |
As you can see, adding a hair light to any existing setup immediately boosts separation and dimensionality. Even a minimal three-light portrait setup — key light, fill light, and hair light — produces results that rival those of seasoned professionals working with five or more sources.

Advanced Hair Light Techniques
Once you have mastered the basics, you can explore more sophisticated approaches to hair lighting that push creative boundaries.
Colored Hair Lights for Creative Portraits
Instead of using a neutral white light source, try placing a color gel over your hair light. A subtle blue or amber gel adds mood and atmosphere, particularly effective in fashion and music photography. Colored rim lights work best when the rest of the lighting setup remains neutral, so the color pops without looking over-processed. Start with 1/8 or 1/4 CTO or CTB gels for a gentle tint before experimenting with more saturated colors.
Double Rim Lighting
For a bold, editorial look, place two hair lights on opposite sides of the subject at equal heights. This creates a symmetrical rim around the entire head and shoulders, commonly seen in high-fashion campaigns. The technique requires precise power matching between both lights to maintain an even effect, so use a light meter to ensure consistency.
Using the Hair Light as a Background Separator
In environmental portraits where the subject stands in front of a textured or colorful backdrop, the hair light doubles as a background illuminator. By angling the light downward, you can light the background surface directly behind the subject, adding depth and color variation to the environment while still maintaining a subtle rim on the hair.
Combining Hair Lights with Reflectors
For a natural-light hair light effect outdoors, position the subject so the sun acts as the backlight and use a reflector on the shadow side as your fill. This creates a convincing rim light without any artificial equipment, making it an ideal technique for on-location portraits with minimal gear.
Common Mistakes and How to Avoid Them
Even experienced photographers occasionally run into problems with hair light setups. Being aware of these pitfalls helps you troubleshoot on the fly.
- Too much spill onto the face: If the hair light is washing out the subject’s features, move the light higher, use a grid modifier, or flag the light to prevent it from reaching the face.
- Uneven rim on curly or textured hair: Curly hair scatters light differently than straight hair. Reduce power and experiment with distance to find the sweet spot.
- Overpowering the key light: A hair light should always remain subordinate to the key light. If it competes for attention, dial it down by at least one stop.
- Ignoring the background: A hair light can unintentionally brighten the background, reducing contrast. Monitor the background exposure and adjust as needed.
- Using the wrong power ratio: A hair light that is too dim will have no visible effect. A hair light that is too bright will look like a separate light source. Aim for a balanced, barely noticeable rim that enhances rather than dominates.
Equipment Recommendations for Hair Light Photography
You do not need expensive gear to achieve professional hair light results, but choosing the right equipment makes a significant difference.

- Flash units: Godox AD200 Pro or Profoto A10 for portable, powerful output.
- Modifiers: A small rectangular softbox, a 10-degree grid, or a snoot for focused control.
- Light stands: C-stands with boom arms allow precise overhead positioning.
- Gels: Lee or Rosco gel sets for creative color effects.
- Flags and gobos: Black foam core or magnetic flags to control spill.
Conclusion
Hair light photography is a deceptively simple technique that delivers outsized results. Whether you are a beginner learning your first lighting setup or an experienced photographer refining a complex multi-light arrangement, the hair light remains one of the most effective tools for creating professional, dimensional portraits. Start with the basic positioning and power adjustments outlined in this guide, and as your confidence grows, explore colored gels, double rims, and environmental background illumination. The key is practice and observation — study how light interacts with different hair textures, skin tones, and backgrounds, and adjust accordingly. With patience and attention to detail, you will soon find that the hair light becomes an indispensable part of your creative toolkit.
Frequently Asked Questions
What is the best hair light angle for portrait photography?
The ideal hair light angle is typically positioned 30 to 45 degrees behind the subject and elevated above the head, pointing downward at approximately 45 degrees. This angle creates a clean rim along the top of the hair and the shoulders without spilling unwanted light onto the face or the front of the subject.
How do you prevent hair light spill onto the subject’s face?
Use a narrow grid modifier or a snoot to restrict the light beam, raise the light higher above the subject, and place black flags or gobos between the hair light and the subject’s face. These techniques give you precise control over where the light lands and help maintain a clean separation between the rim and the key-lit face.
Can you use a hair light outdoors without studio equipment?
Absolutely. Natural sunlight can serve as a powerful hair light when the subject is positioned with the sun behind them. Adding a reflector on the shadow side provides fill, and using a small portable flash with a grid modifier can enhance or supplement the sun’s rim effect for greater consistency.
What is the difference between a hair light and a rim light?
The terms are often used interchangeably, but technically a hair light is positioned specifically to illuminate the hair and top of the shoulders, while a rim light creates a bright edge along the entire silhouette of the subject. In practice, many photographers use both terms to describe the same light source, though the exact positioning and modifier choice may vary depending on the desired effect.
How much power should a hair light have compared to the key light?
A hair light should generally be one to two stops brighter than the key light to create a visible but not overwhelming rim. Starting at one stop above the key light and adjusting based on the background brightness and desired separation gives you a reliable baseline for most portrait scenarios.