When it comes to photography, the gear you use matters — but nothing transforms an image quite like great lighting for photography. Whether you are capturing portraits in a studio, shooting landscapes at golden hour, or documenting products for an e-commerce site, the quality, direction, and color of light can make or break your final result. Understanding how to shape, control, and enhance light is what separates a casual snapshot from a stunning photograph. In this comprehensive guide, we will explore everything from foundational lighting concepts to advanced techniques that will elevate your craft regardless of your skill level.
Why Lighting Matters More Than Your Camera
Many beginner photographers obsess over camera bodies and lenses, but seasoned professionals know that lighting is the single most impactful variable in image creation. A high-end camera paired with poor lighting will still produce flat, uninspiring images. Conversely, a basic camera with expertly controlled light can yield breathtaking results. Light defines mood, reveals texture, creates depth through shadows, and guides the viewer’s eye through the frame.
Consider this: the same subject photographed under harsh midday sunlight looks completely different when lit with a soft diffused source at a 45-degree angle. The colors shift, the shadows change character, and the emotional impact transforms entirely. This is why investing time in understanding photography lighting techniques delivers returns far beyond any piece of equipment you can buy.
Types of Light Sources in Photography
Photographers work with two broad categories of light: natural and artificial. Each has distinct advantages, and mastering both gives you creative flexibility in any shooting scenario.
Natural Light
Natural light comes from the sun and is free, abundant, and endlessly variable. The quality of sunlight changes dramatically based on time of day, weather conditions, and geographic location. Golden hour — the period shortly after sunrise or before sunset — is prized by photographers for its warm, directional, and soft quality. Overcast days, by contrast, act as a giant softbox, producing even, shadowless illumination that is ideal for portraits and product photography.
Key characteristics of natural light include:
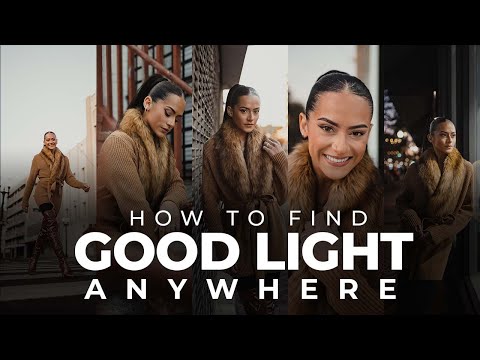
- Direction: Front light, side light, backlight, and rim light all create different moods and dimensional effects.
- Intensity: Harsh at midday, gentle during overcast conditions or twilight hours.
- Color temperature: Shifts from cool blue tones in shade to warm amber tones during golden hour.
Artificial Light
Artificial light gives you full control over intensity, direction, color, and duration. Common artificial light sources include studio strobes, continuous LED panels, speedlights (external flash units), and softboxes. These tools allow you to replicate natural light or create entirely new lighting scenarios that would be impossible outdoors.
When choosing artificial lighting, consider factors such as power output, color temperature consistency, recycling time for strobes, and the ability to modify the light with modifiers like umbrellas, softboxes, or barn doors.
Natural Light vs. Artificial Lighting: A Comparison
Understanding the strengths and limitations of each light source helps you make informed decisions on location or in the studio. Here is a detailed comparison table:

| Feature | Natural Light | Artificial Light |
| Cost | Free | Varies ($50–$3000+) |
| Control Level | Limited — dependent on weather and time | Full control over every parameter |
| Consistency | Changes constantly | Predictable and repeatable |
| Portability | Always available outdoors | Requires carrying equipment |
| Best For | Landscape, lifestyle, environmental portraits | Studio work, product, fashion, event photography |
| Learning Curve | Moderate — reading and anticipating conditions | Steeper — requires technical knowledge of gear |
The most effective photographers often blend both sources, using artificial light to supplement or shape natural light when the existing conditions fall short of their creative vision.
Essential Lighting Setups Every Photographer Should Know
Whether you are just starting out or refining your technique, several classic lighting setups form the foundation of professional-quality photography.
The Rembrandt Lighting Setup
Named after the Dutch master painter, Rembrandt lighting creates a characteristic triangle of light on the shadow side of the subject’s face. It is achieved by placing the key light at approximately 45 degrees to the side and slightly above eye level. This setup adds dramatic depth and dimensionality, making it a favorite for portrait photography.
The Butterfly (Paramount) Lighting Setup
In butterfly lighting, the key light is positioned directly in front of and above the subject, creating a butterfly-shaped shadow beneath the nose. This technique emphasizes cheekbones and jawline, which is why it is widely used in glamour and fashion photography. A reflector below the chin fills the shadow, softening the overall look.
The Split Lighting Setup
Split lighting illuminates exactly half of the subject’s face while leaving the other half in shadow. It creates a moody, dramatic effect that works exceptionally well for artistic portraits and character studies. The key light is placed at 90 degrees directly to the side of the subject.
Lighting Modifiers and Their Impact
The light source itself is only half the equation. How you modify that light has a profound effect on the final image. The most common modifiers include:

- Softboxes: These diffuse light through a translucent fabric, creating a broad, even source that wraps around the subject smoothly. They are essential for portrait and product work.
- Umbrellas: Offering a wider spread of light than softboxes, shoot-through umbrellas are quick and easy to set up, making them ideal for beginner photographers.
- Reflectors: A simple but powerful tool that bounces existing light back onto the subject. They are inexpensive, portable, and indispensable for outdoor natural light work.
- Snoots and Barn Doors: These focus or restrict light to a specific area, creating dramatic pools of illumination or controlling spill.
- Grids and Honeycombs: Attached to modifiers, grids narrow the spread of light and add contrast, helping you achieve more directional, editorial-style lighting.
Expert Tips for Mastering Photography Lighting
Even the best equipment will not save a poorly thought-out lighting plan. Here are practical tips from experienced photographers that will accelerate your growth:
- Learn to see light: Before you even pick up your camera, train your eye to notice the direction, quality, and color of light in everyday environments. Walk through rooms and observe how windows create soft directional light, or how shadows fall on building facades during the afternoon.
- Shoot during blue hour for moody tones: The period before sunrise and after sunset offers a cool, even illumination that creates cinematic, atmospheric images with minimal contrast.
- Use the inverse square law to your advantage: Understanding that light intensity drops off proportionally to the square of the distance allows you to precisely control the brightness ratio between your subject and the background.
- Start with one light and add gradually: Beginners often feel overwhelmed by multi-light setups. Start with a single key light, learn how it behaves, and then introduce fill lights, rim lights, and background lights one at a time.
- Invest in a light meter: While your camera’s built-in meter is useful, an external incident light meter provides far more accurate readings and helps you maintain consistent exposure across complex setups.
- Experiment with color gels: Adding colored gels to your lights introduces creative color effects and allows you to match ambient light sources, ensuring seamless blending in mixed-lighting environments.
Common Lighting Mistakes and How to Avoid Them
Even experienced photographers occasionally fall into lighting traps. Here are some of the most common mistakes:
- Using on-camera flash directly: This creates harsh, unflattering shadows and flat, amateur-looking results. Always bounce the flash off a ceiling or wall, or use an off-camera flash setup instead.
- Ignoring mixed color temperatures: Shooting in a room with both tungsten and fluorescent light sources creates confusing color casts that are difficult to correct in post-production. Gel your lights or choose one dominant source.
- Over-lighting the subject: Too much light eliminates shadows and flattens the image. Shadows are your friend — they add depth, dimension, and drama.
- Neglecting the background: The background is also affected by your lighting choices. Ensure that background light is controlled intentionally rather than left to chance.
Conclusion
Mastering great lighting for photography is a journey that rewards patience, observation, and experimentation. From understanding the interplay of natural and artificial light to confidently executing advanced setups in the studio, the skills you develop will transform every image you create. Start with the fundamentals — learn to read light, invest in a few key modifiers, and practice the classic setups outlined in this guide. As your confidence grows, push boundaries, blend light sources creatively, and develop your own signature lighting style. Remember, the best camera in the world cannot compensate for poor light, but even a modest setup can produce extraordinary results when the light is handled with intention and skill.
Frequently Asked Questions
What is the best lighting for portrait photography?
The best lighting for portrait photography depends on the mood you want to convey. Soft, diffused light from a large softbox or natural window light produces flattering, flattering results for most subjects. For dramatic portraits, Rembrandt lighting or split lighting using a directional key light adds depth and artistic interest. Many professional portrait photographers use a single light source combined with a reflector to achieve balanced, high-quality results without overcomplicating the setup.
How can I improve my natural light photography?
To improve your natural light photography, learn to identify the quality and direction of sunlight at different times of day. Shoot during golden hour for warm, directional light, and seek open shade during midday to avoid harsh shadows. Use a white foam board or collapsible reflector to fill shadows on your subject’s face. Additionally, pay attention to how clouds act as a natural diffuser — overcast days provide beautiful, even illumination for portraits and close-ups.
What lighting equipment is best for beginner photographers?
Beginners should start with affordable, versatile gear. A single speedlight or a basic LED panel, combined with a shoot-through umbrella or a small softbox, gives you enough flexibility to experiment with portrait and product photography. A collapsible reflector is another essential and inexpensive tool that works wonders with natural light. As your skills develop, you can gradually invest in more advanced lighting kits and modifiers.
How do I create soft lighting for product photography?
Soft lighting for product photography is achieved by using large light sources relative to the subject and diffusing them through softboxes, scrims, or diffusion fabric. Positioning the light at a wider angle and increasing its size — either by moving the modifier closer or by using a larger panel — reduces shadow hardness and reveals product details evenly. Many product photographers use two softboxes placed at 45-degree angles on either side of the subject, with a white backdrop to create a clean, professional look.
What is the role of color temperature in photography lighting?
Color temperature, measured in Kelvin (K), determines the warmth or coolness of your light source. Daylight is approximately 5500K, while tungsten bulbs emit a warm orange glow around 3200K and shade produces a cooler blue tone around 7000K. Matching your light source’s color temperature to your camera’s white balance setting ensures accurate, natural-looking colors. Mixing light sources with vastly different color temperatures, such as daylight and indoor tungsten, can create unwanted color casts that require correction in editing.