


Installing Christmas lights outdoors is one of the most rewarding ways to transform your home into a holiday spectacle that delights neighbors, passersby, and loved ones alike. Whether you are a first-time homeowner looking to create a welcoming festive display or a seasoned decorator searching for more efficient methods, understanding the fundamentals of outdoor Christmas lights installation can make all the difference. From selecting the right bulb types and weatherproof connectors to planning layouts that maximize visual impact while keeping safety front and center, this comprehensive guide covers everything you need to know. We will walk you through choosing the best lights, mapping your design, executing a professional-quality install, troubleshooting common issues, and maintaining your display season after season.
Why Outdoor Christmas Light Installation Matters
Outdoor holiday lighting does far more than add seasonal charm. A well-executed display significantly boosts curb appeal, creates a warm and inviting atmosphere, and can even increase the perceived value of your property. According to real estate and holiday staging professionals, homes with coordinated exterior lighting consistently stand out on the block and leave lasting impressions on visitors and potential buyers alike.
However, outdoor installations come with unique challenges. Exposed wiring, weather exposure, gravity loads on gutters and rooflines, and electrical safety concerns all demand careful planning. Understanding outdoor Christmas light installation techniques ensures that your hard work does not end in blown fuses, damaged fixtures, or safety hazards.
- Enhanced curb appeal: A cohesive exterior lighting scheme elevates your home’s architectural features.
- Seasonal ambiance: Properly installed lights create a warm, inviting glow that extends your living space outdoors.
- Safety compliance: Following correct installation practices reduces the risk of electrical fires, trip hazards, and weather-related damage.
- Long-term durability: Quality installations last multiple holiday seasons with minimal maintenance.
Choosing the Right Lights for Your Home Exterior
Not all Christmas lights are created equal, and selecting the appropriate type for outdoor use is the single most important decision you will make before mounting a single bulb. Using indoor-rated lights outside is one of the most common — and most dangerous — mistakes homeowners make during holiday decorating.
Indoor vs. Outdoor-Rated Lights
Outdoor-rated Christmas lights are specifically designed with weather-resistant housings, sealed bulb bases, and reinforced wiring insulation. Look for the UL certification or ETL listing on the packaging, which confirms the product has been independently tested for outdoor safety. Indoor lights lack these protective features and can short-circuit when exposed to moisture, snow, or condensation.
LED vs. Incandescent Bulbs
The debate between LED and incandescent Christmas lights has largely been settled in favor of LED technology for outdoor applications. LEDs consume up to 80% less energy, last significantly longer, and produce far less heat — a critical advantage when lights are strung along rooflines and trees.
| Feature | LED Lights | Incandescent Lights |
| Energy Consumption | 80-90% less energy | Higher wattage per strand |
| Lifespan | 25,000-50,000 hours | 1,000-3,000 hours |
| Heat Output | Very low | High — fire risk near dry foliage |
| Upfront Cost | Higher initial investment | Lower purchase price |
| Brightness | Bright and consistent | Warm, classic glow |
| Weather Resistance | Excellent | Good when rated outdoor |
For most homeowners, LED mini lights or LED C9 bulbs offer the best balance of energy efficiency, durability, and visual impact for outdoor installations.
Planning Your Outdoor Christmas Light Layout
Before you climb a ladder or purchase supplies, invest time in planning. A thoughtful layout prevents wasted materials, minimizes ladder climbs, and ensures a professional-looking result.
Mapping Your Design
Start by walking the perimeter of your home and sketching a rough diagram. Note key architectural features you want to highlight — rooflines, window frames, porch columns, fence lines, and mature trees. Decide on a color scheme and style: classic multicolor, warm white, cool white, or a combination approach works beautifully for many exteriors.
Measuring and Calculating Quantities
- Measure each run: Use a laser distance measurer or tape to record the length of every section where lights will be hung.
- Count connection points: Note where you will need extensions, connectors, or junction boxes.
- Check strand lengths: Standard outdoor Christmas light strands typically come in 25-foot, 50-foot, or 100-foot lengths. Calculate total linear footage needed.
- Verify circuit capacity: A standard household 15-amp circuit can safely handle approximately 1,440 watts. Do not exceed this limit to avoid tripping breakers.
Always purchase 10-15% more lights than your measurements indicate. It is far easier to have extra than to scramble for replacement bulbs mid-installation.
Step-by-Step Outdoor Christmas Lights Installation Guide
Now comes the execution phase. Follow these steps methodically for a safe, clean, and impressive result.
- Inspect all lights before hanging: Plug in every strand indoors and check for burnt-out bulbs, flickering sections, or exposed wires. Replace faulty bulbs and discard damaged strands.
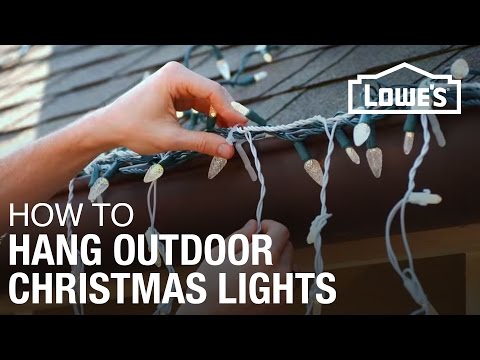
- Gather your mounting hardware: Use outdoor-rated clips, hooks, gutter mounts, shingle clips, and zip ties appropriate for your surface types. Avoid staples, which can puncture wiring and void warranties.
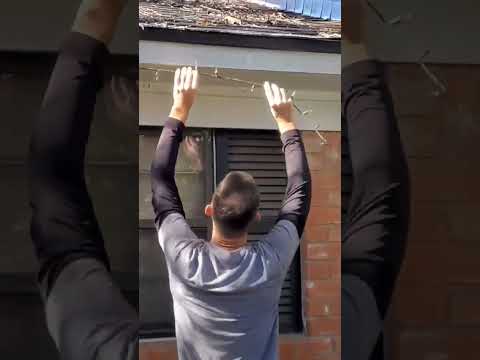
- Attach clips to gutters and fascia boards first: Work along the roofline systematically, spacing clips every 12-18 inches for stability.
- Start at the power source end: Begin hanging lights nearest to your outdoor outlet and work outward. This ensures you can test each section as you go.
- Use outdoor-rated extension cords: Choose heavy-gauge cords (12 or 14 gauge) rated for outdoor use, and keep all connections elevated off the ground using cord clips or elevated hooks.
- Install a GFCI-protected outlet or outdoor-rated timer: A ground-fault circuit interrupter prevents electrical shock, and a programmable timer automates your display every evening.
- Test the full installation: Once all strands are hung, plug everything in and walk the perimeter to verify every section is working correctly.
Pro tip: Use a sturdy ladder on level ground, and never overreach. Having a helper hold the ladder and pass tools dramatically improves both safety and efficiency.
Safety Best Practices for Exterior Christmas Lighting
Outdoor electricity and winter weather are a combination that demands respect. Observing these safety guidelines protects your family, your home, and your investment.
- Always use outdoor-rated extension cords and connectors. Indoor cords lack the protective insulation needed for exposure to moisture and temperature fluctuations.
- Never daisy-chain more than three strands of standard incandescent lights unless the manufacturer explicitly permits it. LED strands generally allow more connections per circuit.
- Keep all electrical connections elevated and off the ground. Standing water and snow can infiltrate unprotected plugs and cause shorts.
- Use a plastic hook ladder stabilizer instead of resting ladders directly on gutters, which can bend or damage aluminum fascia.
- Turn off all lights before leaving home or going to bed. Use an outdoor timer or smart plug to automate this step reliably.
- Inspect lights annually before hanging. Discard any strand with cracked insulation, corroded plugs, or damaged sockets.
Comparison: Popular Outdoor Installation Methods
Different mounting approaches suit different home types and aesthetic goals. Here is a side-by-side look at the most common methods.
| Method | Best For | Difficulty Level | Durability | Visual Impact |
| Gutter Clips | Homes with gutters and fascia boards | Easy | High — removable season to season | Clean, uniform line along roofline |
| Shingle Clips | Homes without gutters or tile roofing | Easy to Moderate | High | Subtle, integrated look |
| Zip Ties and Wire | Trees, fences, and freestanding structures | Moderate | Moderate — check ties annually | Flexible, wraps around any shape |
| Adhesive Mounts | Windows, siding, and smooth surfaces | Easy | Moderate — adhesive weakens in cold | No visible hardware |
| Light Projectors | Large surface coverage (walls, fences) | Easy | High | Dramatic, wide-area illumination |
Most professional installers recommend combining two or more methods for a layered, dynamic look. For example, gutter clips along the roofline paired with zip ties wrapping trees in the front yard creates depth and visual interest that a single method cannot achieve alone.
Maintenance and Troubleshooting
A professional-looking display does not maintain itself. Taking a few simple steps after installation extends the life of your lights and keeps your home looking its best throughout the holiday season.
- Check bulbs weekly: Wind, rain, and critters can dislodge bulbs. Replace them promptly using the same wattage and color temperature.
- Clear snow and ice from light strands: Heavy accumulation can pull clips and sag wiring. Gently brush off buildup with a soft broom from the ground.
- Store lights properly between seasons: Wrap strands around a piece of cardboard or a dedicated light reel, store in a sealed plastic bin, and keep in a cool, dry location. Proper storage prevents tangling and extends bulb lifespan by years.
- Label your plug ends: Use masking tape and a marker to note which circuit each plug controls. This saves enormous time during next year’s installation.
Frequently Asked Questions
What is the best way to hang Christmas lights on a house without gutters? Shingle clips and stainless-steel hooks that grip between shingles are the most reliable method. For smooth siding surfaces, outdoor-rated adhesive mounting strips work well, though you should supplement them with plastic zip ties for wind-heavy strands.
How many strands of outdoor Christmas lights can I connect together? Most manufacturers recommend no more than three to five standard strands daisy-chained together. Check the specific wattage rating on each package and ensure your total does not exceed 80% of your circuit’s amperage capacity.
Can I install outdoor Christmas lights myself, or should I hire a professional? Homeowners with basic DIY skills and a sturdy ladder can absolutely install their own displays for most single-story homes. Two-story or multi-story homes, steep roofs, and complex installations are best handled by licensed professionals who carry liability insurance and use commercial-grade equipment.
What type of outdoor Christmas lights are best for a modern, minimalist look? Warm-white LED mini lights or LED wire lights (often called “fairy lights”) create a clean, contemporary aesthetic. Avoid multicolor strands for minimalist designs — instead, opt for consistent warm or cool white tones that complement modern architecture.
How do I protect outdoor Christmas lights from wind and weather damage? Use weatherproof connectors and seal any plug junctions with silicone tape or enclosed outdoor-rated connector boxes. Secure all strands tightly with clips and zip ties to minimize flapping, and choose LED lights, which are inherently more resilient to temperature extremes than incandescent alternatives.
What is the easiest timer or smart plug solution for automated outdoor Christmas lighting? Wi-Fi smart plugs compatible with Alexa or Google Home allow you to set schedules, adjust brightness, and even control lights remotely from your smartphone. Brands like TP-Link Kasa and Amazon Smart Plug offer reliable, weather-resistant options designed specifically for outdoor use.
Conclusion
Mastering the art of outdoor Christmas lights installation is a worthwhile skill that pays dividends every holiday season. By selecting the right lights for your climate and exterior, planning a thoughtful layout, following safe installation practices, and maintaining your display with minimal effort, you can create a home that becomes the envy of the entire neighborhood. Whether you prefer a simple, elegant glow or an elaborate, jaw-dropping spectacle, the principles outlined in this guide give you the foundation to execute it safely, efficiently, and beautifully year after year.