


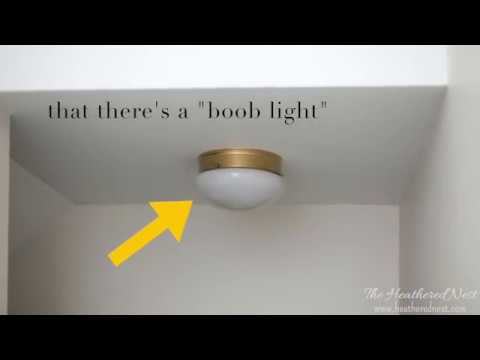
When your ceiling fan light cover looks cracked, yellowed, or just outdated, the entire fixture can drag down the aesthetic of your living space. Replacing a ceiling fan light cover is one of the most satisfying and straightforward home improvement projects you can tackle. Whether you are dealing with a shattered glass globe or simply want to upgrade to a modern acrylic dome, understanding the process ensures you complete the job safely and efficiently. This comprehensive guide walks you through everything you need to know, from selecting the perfect replacement to executing the swap like a seasoned electrician.
Why Ceiling Fan Light Cover Replacement Matters
Many homeowners ignore a damaged fan light shade until it becomes a glaring eyesore. However, replacing a broken or outdated glass ceiling fan cover does more than just enhance your room’s visual appeal. A compromised cover can expose live wiring, allowing dust and moisture to seep into the electrical components, which drastically reduces the overall illumination of your space. When a cover is cracked or warped, it fails to properly distribute light, casting harsh shadows and dark spots throughout your room. Addressing this issue promptly protects both your home and your family from potential electrical hazards. Furthermore, updating the shade can completely transform the ambiance of a living space without the expense of a full fixture overhaul, proving that small updates often yield the biggest returns in home decor.

Understanding the Different Types of Ceiling Fan Light Covers
Before you buy a replacement, you must understand the materials and shapes available on the market. Not all glass ceiling fan covers are created equal, and choosing the wrong type can lead to compatibility issues.
- Glass Globes: Traditional and elegant, glass globes provide a classic look and are highly durable, though they are heavier and prone to shattering if impacted.
- Acrylic Domes: Lightweight and shatter-resistant, acrylic domes are ideal for high-traffic areas or homes with children and pets. They are also easier to handle during the change ceiling fan light globe process.
- Metal Shades: Offering a more industrial or contemporary vibe, metal shades direct light downward rather than diffusing it evenly.
- Fabric or Paper Shades: Often found in vintage models, these are rarely repairable and require complete replacement if damaged.
How to Choose the Right Replacement for Your Fan Light Shade
Selecting the appropriate replacement involves more than just picking a style you like. You need to consider the mounting mechanism, the size of the canopy, and the voltage rating of the fixture. Different fans use specific change fan light globe systems, so taking the time to identify your exact model before shopping is critical. Start by turning off the power at the circuit breaker. Once the power is confirmed off, you can safely remove the existing shade to take precise measurements. Note the thread size of the mounting nut and the overall diameter of the dome. When shopping for a change fan light globe kit, always check the maximum wattage rating to ensure the new cover can handle the heat output of your bulbs, especially if you are switching to halogen or incandescent options. Using an under-rated cover with high-wattage bulbs can cause the shade to warp or melt, creating a severe fire hazard.
| Cover Type | Durability | Light Diffusion | Best For |
| Glass Globe | High (scratch prone) | Even, warm glow | Formal living rooms, dining areas |
| Acrylic Dome | Very High (shatterproof) | Bright, slightly tinted | Family rooms, kitchens, hallways |
| Metal Shade | Moderate | Directional, focused | Task lighting, modern decors |
| Fabric Shade | Low | Soft, ambient | Vintage fixtures, decorative accents |
Step-by-Step Guide to Ceiling Fan Light Cover Replacement
Executing a replace fan light shade project is easier than most people assume. Follow these numbered steps to ensure a safe and secure installation.
- Power Down: Locate your home’s circuit breaker and switch off the power to the ceiling fan. Use a non-contact voltage tester to confirm the power is completely disconnected.
- Remove the Bulbs: Carefully unscrew and remove all light bulbs from the fixture to prevent them from falling or breaking during the process.
- Detach the Existing Cover: Most glass ceiling fan covers are held in place by a decorative canopy or a threaded mounting nut located inside the fixture. Gently loosen the nut or unhook the clips.
- Disconnect the Wiring: If your fixture has a pull-chain switch connected to the cover, carefully disconnect the wires. Note the color coding (black to black, white to white, green or bare to ground).
- Mount the New Cover: Thread the new shade onto the mounting bracket or secure it with the provided hardware. Ensure the canopy sits flush against the ceiling.
- Restore Power and Test: Return to the breaker box and restore power. Flip the switch and test the new light cover to ensure everything illuminates correctly.

Advanced Techniques for Stubborn Mounting Mechanisms
Some vintage or modern designs feature complex mounting systems that make removing the old cover a challenge. If you encounter a rusted or stripped nut, do not force it, as this can crack the fixture housing. Instead, apply a penetrating lubricant like WD-40 and allow it to sit for fifteen minutes before attempting to turn it again. For fixtures where the wiring has deteriorated or the pull-chain switch is broken, it is crucial to replace the entire wire harness before installing the new shade. Never attempt to patch damaged wires with electrical tape alone; always install a proper wire connector to ensure a safe electrical connection. If the ceiling fan light cover replacement involves updating to an LED-rated kit, ensure the new fixture includes proper heat dissipation features, as enclosed fixtures require specific LED bulbs to prevent overheating and premature burnouts.
Expert Tips to Extend the Life of Your New Cover
Once you have successfully changed your ceiling fan light shade, maintaining it will keep it looking pristine for years to come. Dust your fan covers regularly using a microfiber cloth or an extendable duster. Accumulated dust not only dims the light output but can also become a fire hazard if it mixes with residual heat from the bulbs. For glass globes, a solution of equal parts water and vinegar can remove hard water spots and fingerprints without leaving streaks. Acrylic domes, while scratch-resistant, should never be cleaned with abrasive chemicals or rough pads, as these will cloud the surface over time. Additionally, check the mounting hardware every six months to ensure the cover remains securely in place, especially if your ceiling fan sees frequent use. Tightening loose screws prevents the shade from wobbling, which can weaken the connections over time. These small maintenance habits prevent the need for premature replacements and keep your fixture functioning at its best.
Conclusion
Replacing a ceiling fan light cover is a quick, rewarding project that elevates both the safety and style of your home. By understanding the materials, selecting the right fit, and following the proper safety protocols, you can easily update your fixture in under an hour. Whether you are a beginner tackling your first home repair or an experienced DIYer looking to refine your technique, a fresh shade instantly revitalizes your space. Do not wait for a broken cover to become an electrical hazard or an eyesore; take action today and enjoy the bright, beautiful glow of a properly installed fan light. If you are considering a smart home upgrade, many modern covers are now compatible with smart bulbs, allowing you to control your lighting directly from your phone.
Frequently Asked Questions About Ceiling Fan Light Cover Replacement
One common question is: How do I measure my ceiling fan light globe for a replacement? To measure your globe, determine the diameter of the glass at its widest point and the height from the base to the top. Also, check the thread size of the mounting nut inside the fixture. Most standard glass globes range from 8 to 12 inches in diameter, but exact measurements are crucial to ensure a proper fit during your ceiling fan light cover replacement.
Another frequently asked question is: Can I replace a glass ceiling fan light cover with an acrylic dome? Yes, you can absolutely replace a glass cover with an acrylic dome. Acrylic is significantly lighter, shatterproof, and easier to clean than glass. Just ensure the acrylic dome matches the mounting hardware of your existing fixture. The process for installing an acrylic change fan light globe is identical to installing glass, but you will have an easier time handling the lighter material.
Many users ask: Why does my new ceiling fan light shade look crooked after installation? A crooked shade usually indicates an uneven mounting surface or an improperly aligned canopy. Ensure that the ceiling box is secure and level before installing the new cover. If the mounting bracket is bent or the canopy screws are not tightened evenly, the shade will sit at an angle. Tighten all screws symmetrically to straighten the fixture.
Homeowners often wonder: Do I need an electrician to replace a ceiling fan light cover? In most cases, replacing a ceiling fan light cover does not require a licensed electrician, provided you turn off the power at the breaker and use a voltage tester. However, if you discover damaged wiring, corroded connections, or a faulty pull chain switch during the replace fan light shade process, it is best to consult a professional to avoid electrical hazards.
A final common question: What is the difference between a canopy and a light cover in a ceiling fan? The canopy is the decorative piece that mounts directly to the ceiling and covers the electrical box and wires. The light cover, also known as a globe, dome, or shade, is the part that encloses the light bulb and housing. During a ceiling fan light cover replacement, you are typically replacing the globe or shade, not the canopy, unless the canopy itself is damaged or outdated.