When you look at a stunning portrait or a product shot that seems to leap off the screen, one element is almost always responsible for that striking visual impact: the key light. In photography, the key light is the primary and most dominant light source in any lighting setup, and understanding how to use it effectively is the single most important skill you can develop as a photographer. Whether you are a beginner experimenting with a single strobe or an advanced portraitist crafting cinematic lighting schemes, mastering key light photography will transform the way you capture and shape light. This comprehensive guide walks you through everything from foundational concepts to expert-level techniques, giving you the knowledge and confidence to create professional-quality images every time.
What Is Key Light in Photography?
In simple terms, the key light is the main light source that illuminates your subject and defines the primary shadows, highlights, and contrast in your image. Every lighting setup — whether it is a single flash on a stand or a complex multi-light studio arrangement — starts with the key light. It is the light that tells the story of your photograph by revealing form, texture, and dimension. Without a key light, your subject would appear flat and two-dimensional, lacking the depth and drama that draws the viewer’s eye.
The position, angle, intensity, and modifier of your key light all work together to create a specific mood and aesthetic. Moving the key light even a few inches can completely change the character of a portrait, shifting from soft and flattering to dramatic and moody. This is why professional photographers spend so much time dialing in their key light placement before worrying about any secondary lights.
How to Set Up a Key Light for Different Photography Styles

Portrait Photography Key Light Setup
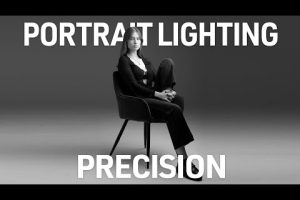
In portrait photography, the key light is almost always positioned slightly above and to one side of the subject’s face, typically at a 30- to 45-degree angle from the camera axis. This classic placement creates natural-looking shadows that model the face and add depth. The exact height matters just as much as the angle — raising the key light above eye level produces shadows that fall beneath the cheekbones and nose, while lowering it creates a more unusual, sometimes eerie effect that can work beautifully for creative portraits.
For beginners, a softbox or large umbrella is the best key light modifier to start with. These spread the light over a wider area, producing softer shadows that are forgiving on skin and flattering for most subjects. As you gain experience, you can experiment with smaller modifiers like a beauty dish or a snoot for more focused, contrasty lighting.
Product Photography Key Light Placement
Product photography demands precision with key light positioning because every highlight and shadow directly affects how the product is perceived. The key light is typically placed at a 45-degree angle to the product, slightly above, to create a clean gradient of light and shadow that highlights texture and form. For glossy products like glass or jewelry, you may need to adjust the angle carefully to control reflections and avoid hot spots.
Many product photographers use a single key light combined with negative fill (black cards or flags) to deepen shadows and add drama, making the product appear more three-dimensional and luxurious on camera.
Key Light vs Fill Light vs Backlight: Understanding the Three-Point Lighting System
The three-point lighting system is the cornerstone of professional photography and videography. Understanding how the key light interacts with the other two lights is essential for creating balanced, well-lit images.
| Light Source | Role | Position Relative to Subject |
| Key Light | Primary illumination; defines shadows, highlights, and contrast | 30–45 degrees off-axis, slightly above eye level |
| Fill Light | Softens and reduces shadows created by the key light | Opposite side of the key light, closer to the camera |
| Backlight (Rim Light) | Separates the subject from the background with a glowing edge | Behind the subject, angled toward the camera |
The key light is always the brightest source in this system. The fill light, placed on the opposite side, is intentionally dimmer — usually one to two stops below the key light — to preserve dimensionality while preventing shadows from going completely black. The backlight adds separation and a sense of depth that makes the subject pop from the background. Mastering the relationship between these three lights is what separates amateur snapshots from truly professional work.
Best Key Light Modifiers and Equipment
The modifier you choose for your key light dramatically affects the quality and character of the light hitting your subject. Here are the most popular options used by working photographers:
- Softbox: Produces soft, even light with gradual shadow transitions. Ideal for portraits and beauty work.
- Umbrella: Creates broader, more diffused light that wraps around the subject. Great for beginners and group shots.
- Beauty Dish: Delivers a unique mix of soft and contrasty light with a pronounced catchlight in the eyes. A favorite for fashion and editorial portraits.
- Parabolic Reflector: Offers directional control with a wide spread, excellent for both portraits and product work.
- Snoot: Focuses the light into a tight beam for dramatic, isolated illumination on a specific area of the subject.
- Grid/Gel Modifier: Narrows the light spread and can add color effects for creative key light setups.
If you are building your first lighting kit, a reliable monolight paired with a 24-inch softbox gives you an incredibly versatile key light that can handle the vast majority of portrait and product scenarios you will encounter.
Common Key Light Mistakes and How to Fix Them
Even experienced photographers occasionally run into issues with their key light setups. Here are the most common mistakes and practical solutions:
- Placing the key light too close to the camera. This creates flat, uninspiring light with minimal shadow. Move the key light further off to the side and adjust the angle to restore dimension.
- Using too much power. An overly intense key light blows out highlights and destroys detail in bright areas. Reduce the power or increase the distance between the light and the subject.
- Ignoring the catchlight. The reflection of your key light in the subject’s eyes (the catchlight) adds life and sparkle to portraits. Position the modifier at a height that places the catchlight naturally in the eye.
- Forgetting about the background. A key light that is too strong can spill onto the background, reducing contrast and making the subject blend in. Use flags, barn doors, or a flag on the light stand to control spill.
- Not adjusting for subject shape. Round faces benefit from key lights placed more to the side, while narrow faces look better with the light slightly more frontal. Always consider your subject’s face shape when choosing the key light angle.
Advanced Key Light Techniques for Creative Photography
Once you are comfortable with the basics, you can start pushing the boundaries of key light photography with advanced techniques. Clamshell lighting, for example, uses a key light above the subject and a reflector below to create a beautiful, symmetrical fill that is extremely popular in beauty and fashion photography. Rembrandt lighting places the key light higher and further to the side, creating a distinctive triangle of light on the shadow side of the face — one of the most iconic and recognizable lighting patterns in portrait photography.
For a more dramatic look, try using a bare bulb or a strip softbox as your key light source. The narrow, focused quality of a strip box creates elongated highlights and deep shadows that sculpt the face with intense dimensionality. Combining a colored gel on your key light with a contrasting fill can produce moody, cinematic images that feel like stills from a movie.
Another powerful technique is to use a flag or a gobo (go-between) to shape the key light, blocking portions of the light beam to create intentional patterns of shadow on the subject. This is widely used in fashion and fine art photography to add visual interest and narrative depth.
Remember, the key light is not just a technical tool — it is a creative instrument. The angle, quality, and intensity of your key light communicate emotion, tell a story, and define the visual identity of your image. The more you experiment with different positions, modifiers, and power levels, the more intuitive your lighting decisions will become.

Frequently Asked Questions
What is the difference between key light and fill light in photography? The key light is the primary and brightest light source that defines the main shadows and highlights on your subject, while the fill light is a secondary, lower-intensity light placed on the opposite side to soften those shadows and reduce overall contrast. The key light drives the mood and dimension of the image, whereas the fill light simply controls how deep the shadows become.
Where should the key light be placed for flattering portrait photography? For a flattering portrait, position the key light at approximately 30 to 45 degrees to one side of the camera axis and slightly above the subject’s eye level. This placement creates natural shadow patterns that define the facial structure without being harsh or unflattering, making it the most universally pleasing starting point for key light portrait setups.
Can you use natural sunlight as a key light source? Absolutely. Natural sunlight works beautifully as a key light, especially during the golden hours around sunrise and sunset. A large window with sheer curtains can also serve as a soft, diffused key light source for indoor portrait and still-life photography, giving you beautiful, even illumination without any artificial equipment.
What is the best key light modifier for beginners? A softbox is widely considered the best key light modifier for beginners because it produces soft, forgiving light that is easy to work with and difficult to mess up. A large white umbrella is another excellent starting point, as it is inexpensive, simple to set up, and creates broad, diffused illumination that flatters a wide range of subjects and shooting scenarios.
How do you balance the key light with ambient light in a mixed lighting situation? To balance your key light with ambient light, start by setting your camera exposure to properly expose the ambient light, then add your key light at a power level that is one to two stops brighter than the ambient. This ensures the key light is the dominant source without completely overwhelming the natural light, creating a balanced and realistic-looking image with deliberate direction and depth.