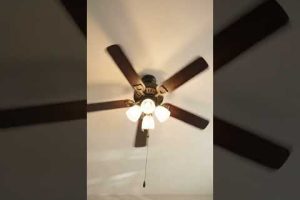
If you have a ceiling fan without a light or are looking to upgrade your existing setup, a ceiling fan light kit is one of the most impactful and cost-effective home improvements you can make. These kits transform an ordinary fan into a fully functional lighting fixture, adding both ambiance and practical illumination to any room. Whether you are renovating a bedroom, upgrading a living space, or simply replacing an outdated fan accessory, understanding the ins and outs of ceiling fan light kits will save you time, money, and frustration. In this comprehensive guide, we will cover everything from the different types of kits available and key features to consider, to installation steps, expert tips, and frequently asked questions that will help you make the best purchasing decision for your home.
What Is a Ceiling Fan Light Kit?
A ceiling fan light kit is a modular lighting assembly designed to attach directly to an existing or new ceiling fan unit. Most ceiling fans come with a mounting bracket and a fan motor housing that includes a dedicated slot or hook specifically engineered to accept a light kit. The kit typically consists of a light socket assembly, a glass or acrylic globe or shade, wiring connectors, and a canopy that conceals the junction box above the fan. Some kits are sold as standalone accessories, while others are bundled as part of a complete fan-and-light package. The beauty of a light kit lies in its versatility — you can mix and match styles, bulb types, and brightness levels to suit your personal taste and room requirements.
Types of Ceiling Fan Light Kits
Not all light kits are created equal, and understanding the major categories will help you narrow your options significantly.
Plug-and-Play Light Kits
These are the most popular and user-friendly kits on the market. They snap or slide into the fan’s mounting bracket without requiring any electrical wiring or specialized tools. Most plug-and-play kits feature a simple bayonet or twist-lock mechanism that connects to the fan’s existing wiring harness. Brands like Hunter, Hampton Bay, and Minka-Aire offer extensive lines of plug-and-play kits designed to match their fan models, though universal-fit kits are also widely available and compatible with many brands.

Retrofit Light Kits
A retrofit light kit is designed for older ceiling fans that were originally manufactured without a light option or with an outdated lighting assembly. These kits often include their own wiring harness and mounting hardware, making them adaptable to fans that lack a dedicated light slot. Retrofit kits are especially valuable for vintage or antique-style fans where original replacement parts are no longer manufactured.
Custom and Designer Light Kits
For homeowners who want a high-end or bespoke look, designer light kits offer premium materials such as crystal, brushed nickel, bronze, and hand-blown glass. These kits often feature adjustable brightness settings, remote control compatibility, and sleek, architectural designs that elevate the entire aesthetic of a room. While they come at a higher price point, the visual impact and durability they deliver are unmatched.
Key Features to Consider When Choosing a Ceiling Fan Light Kit
Selecting the right light kit involves evaluating several critical factors that affect both performance and aesthetics.
- Compatibility with your fan model — Always verify that the kit is designed for your specific fan brand and model, or confirm that a universal kit will fit your mounting system.
- Bulb type and wattage — Modern kits support a range of bulb types, including LED, CFL, and incandescent. LED kits are the most energy-efficient and longest-lasting option, typically rated for 15,000 to 50,000 hours of use.
- Dimmability — If you want adjustable lighting moods, choose a kit that is compatible with dimmer switches or fans that have built-in dimmer controls on the pull chain or remote.
- Light shade and globe style — The shade or globe affects both light distribution and room decor. Options range from clear glass for a modern look to frosted or textured shades for softer, diffused illumination.
- Ease of installation — Plug-and-play kits are ideal for DIY beginners, while kits that require hardwiring may demand a licensed electrician depending on local building codes.
- Finish and design — Match the kit’s finish (brushed nickel, oil-rubbed bronze, satin chrome, matte black) to your fan and room fixtures for a cohesive look.
How to Install a Ceiling Fan Light Kit
Installing a ceiling fan light kit is a straightforward process for most homeowners with basic DIY skills. Here is a step-by-step overview of the typical installation process.
- Turn off the power — Switch off the circuit breaker that controls the ceiling fan and use a voltage tester to confirm the power is fully disconnected before touching any wires.
- Remove the existing light assembly — If your fan already has a light, unscrew the globe or shade, remove the bulbs, and detach the old light kit from the mounting bracket.
- Connect the wiring — For plug-and-play kits, align the wiring harness connector and twist or snap it into place. For hardwired kits, connect the black (hot) wire to the black wire, the white (neutral) wire to the white wire, and the green or bare copper wire to the grounding screw.
- Secure the canopy — Slide the decorative canopy up against the ceiling and tighten the mounting screws to hold the kit firmly in place.
- Install the shade or globe — Attach the light shade or glass globe according to the manufacturer’s instructions, then insert the appropriate bulbs.
- Restore power and test — Turn the circuit breaker back on, switch the fan light on, and verify that all bulbs illuminate properly.
Expert tip: Always use bulbs that do not exceed the maximum wattage rating specified by the light kit manufacturer to prevent overheating and potential fire hazards.
Comparison of Top Ceiling Fan Light Kits
Below is a comparison of some of the most popular ceiling fan light kits available, categorized by price range and key features.
| Kit Name | Type | Bulb Compatibility | Dimmable | Approx. Price |
| Hunter Original Universal Kit | Plug-and-Play | LED, CFL, Incandescent | Yes (with dimmer switch) | $25 – $40 |
| Hampton Bay Glass Globe Kit | Plug-and-Play | LED only (max 60W equivalent) | No | $15 – $30 |
| Minka-Aire Designer Crystal Kit | Custom | LED, CFL | Yes (fan remote) | $80 – $150 |
| Westinghouse Retrofit Universal Kit | Retrofit | LED, Incandescent | Yes (with dimmer) | $20 – $35 |
| Fanimation Modern Chrome Kit | Custom | LED only | Yes (fan remote) | $60 – $100 |
Common Mistakes to Avoid When Choosing and Installing Light Kits
- Buying the wrong size kit — Measure the mounting bracket dimensions on your fan before purchasing a kit. A kit that is too large or too small will not fit properly, even if the brand is compatible.
- Ignoring weight limits — Ceiling fan light kits add weight to the fan assembly. Ensure your fan’s motor and mounting bracket can safely support the additional load, especially with heavy crystal or metal kits.
- Overlooking clearance — The light kit must not interfere with the fan blades’ rotation. Check that the globe or shade provides adequate clearance from the blades, especially on low-ceiling installations.
- Skipping the dimmer upgrade — If you invest in a dimmable kit but do not install a compatible dimmer switch, you will not be able to adjust the brightness, limiting the kit’s full potential.
- Using incorrect bulbs — Always match the bulb base type (E26 standard, E12 candelabra, etc.) and wattage rating to the kit’s specifications to avoid damaging the socket or creating a safety hazard.
Maintenance and Troubleshooting Tips
Keeping your ceiling fan light kit in top condition ensures consistent performance and extends its lifespan. Dust the light shade or globe regularly using a microfiber cloth or a gentle duster to prevent dust buildup that can dull the light output. Inspect the wiring connections annually, especially if you notice flickering lights or intermittent operation. If a bulb burns out frequently, check the socket for signs of corrosion or loose connections, and replace any damaged components immediately. For kits with remote controls, replace the batteries in the remote annually and keep spare batteries on hand to avoid interruptions.
If your light kit stops working entirely, troubleshoot in this order: check the circuit breaker, verify the pull chain is in the “on” position, test the bulbs in a known-working fixture, and inspect the wiring harness connection between the fan and the kit. In most cases, a simple reconnection or bulb replacement resolves the issue without requiring professional assistance.

Frequently Asked Questions
Can I install a ceiling fan light kit myself, or do I need an electrician?
Plug-and-play light kits are specifically designed for DIY installation and do not require electrical wiring knowledge. However, if your fan requires hardwired connections or if you are uncomfortable working with electrical components, hiring a licensed electrician is always a safe and recommended choice.
Are universal ceiling fan light kits compatible with all brands?
Universal kits are designed to fit a wide range of ceiling fan brands and models, but compatibility is not guaranteed for every fan. Always check the manufacturer’s compatibility list or measure your fan’s mounting bracket before purchasing a universal kit to ensure a proper fit.

What is the best bulb type for a ceiling fan light kit?
LED bulbs are the best choice for ceiling fan light kits. They are energy-efficient, produce minimal heat, last significantly longer than traditional bulbs, and are available in a wide range of color temperatures and brightness levels to suit any room.
How do I know if my ceiling fan light kit is dimmable?
Check the product specifications on the packaging or the manufacturer’s website. Look for labels that say “dimmable” or “compatible with dimmer switches.” You will also need a dimmer switch installed on your wall or a fan remote with dimming capabilities to take advantage of this feature.
Can I upgrade an old ceiling fan that does not have a light to include a light kit?
Yes, in most cases. Retrofit light kits are specifically engineered for this purpose. They include their own mounting hardware and wiring harness, making it possible to add a light kit to fans that were manufactured without lighting capabilities.
Final Thoughts
A ceiling fan light kit is a simple yet transformative addition that enhances both the functionality and the visual appeal of your living space. Whether you opt for an affordable plug-and-play option or invest in a premium designer kit, the key to success lies in choosing a product that is compatible with your fan, suits your room’s aesthetic, and meets your lighting needs. By following the installation and maintenance guidelines outlined in this article, you can enjoy a beautifully illuminated room with the gentle comfort of a ceiling fan for years to come. Take your time researching options, compare features carefully, and do not hesitate to consult a professional if you have any doubts about the electrical aspects of your installation.