


When it comes to kitchen lighting design, few options deliver the combination of clean aesthetics, versatility, and functional illumination that can lights bring to the table. These recessed fixtures — also known as downlights or pot lights — have become a go-to choice for homeowners and designers looking to create a well-lit, modern kitchen space that works as hard as it looks. Whether you are remodeling an outdated cooking area or building a brand-new home from the ground up, understanding how to select, place, and optimize your can lights kitchen setup can make or break the entire atmosphere of your culinary space.
What Are Can Lights and Why Do Kitchens Need Them?
A can light is a light fixture that is installed into a hollow opening, or “can,” in the ceiling. The fixture sits flush with the surface, creating a sleek, minimalist look that has made it one of the most popular recessed lighting options for kitchens. Unlike pendant lights or surface-mounted fixtures that hang down and consume headroom, can lights sit inside the ceiling plane and direct light downward in a focused beam. This makes them ideal for kitchens where you need targeted illumination over countertops, islands, and dining areas without cluttering the visual space.
The reason can lights have become so synonymous with kitchen lighting is simple: they solve real problems. They provide even ambient light across large open floor plans, they can be positioned precisely over task areas like prep counters and stovetops, and they work beautifully as part of layered lighting schemes that combine overhead, accent, and under-cabinet sources. When planned correctly, a kitchen can lights layout transforms how the entire room feels — brighter, more spacious, and far more functional.
Types of Can Lights for Kitchen Spaces
Not all recessed fixtures are created equal, and understanding the different categories of can lights will help you make informed decisions for your kitchen project. Here are the primary types you will encounter.
New Construction vs. Retrofit Can Lights
New construction can lights are designed to be installed before drywall goes up, giving you direct access to ceiling joists and electrical wiring. These fixtures have a much larger housing and are ideal if you are building a kitchen from scratch or doing major structural work. Retrofit can lights, on the other hand, are designed for installation through a small hole in an existing ceiling. They squeeze into the space between joists and expand their clamping arms from inside, making them the best choice for kitchen remodels where you want to upgrade your lighting without tearing out the ceiling.
IC-Rated vs. Non-IC-Rated Can Lights
IC-rated, or insulation-contact-rated, can lights are safe to install in ceilings that have insulation directly touching the fixture housing. This is critical for kitchens in newer homes where building codes require insulated ceilings. Non-IC-rated fixtures cannot come into contact with insulation and are typically older models. If you are unsure which type your kitchen needs, check your local building codes and the condition of your ceiling insulation before purchasing.
How to Choose the Right Can Lights for Your Kitchen
Selecting the appropriate can lights for your kitchen involves several key decisions that affect both appearance and performance.
- Fixture Size: For most residential kitchens, 4-inch or 5-inch can lights strike the right balance between light output and visual proportion. Larger 6-inch fixtures work well in open-concept kitchens with higher ceilings but can look oversized in smaller galley-style spaces.
- Color Temperature: A color temperature between 3000K and 4000K is the sweet spot for kitchens. 3000K produces a warm, inviting glow that is flattering and comfortable, while 4000K offers a crisper, more neutral light that makes food colors pop and improves task visibility.
- Trim Style: The trim is the visible part of the fixture that sits in the ceiling. Baffle trims reduce glare and provide a soft, diffused light. Reflector trims maximize light output and direct illumination downward. Adjustable trims allow you to angle the light where you need it most, making them excellent for highlighting artwork or architectural features.
- Dimmability: Always choose dimmable can lights for your kitchen. The ability to adjust brightness gives you flexibility from bright task lighting during meal prep to soft ambient glow during evening entertaining.
Can Lights Kitchen Layout: Placement Tips for Perfect Illumination
The placement of your recessed lights is arguably the most important factor in achieving a professional, well-designed result. A poorly spaced layout leads to dark spots, harsh shadows, and an unbalanced look that no amount of quality fixtures can fix.
General Spacing Rules
A common rule of thumb for can lights kitchen layouts is to space fixtures approximately 4 to 6 feet apart in a grid pattern. For a standard 10-by-12-foot kitchen, this typically translates to a 3-by-4 grid of fixtures. The general lighting formula used by designers is to divide the room’s total square footage by 1.5 to determine the total wattage needed, then distribute that across all fixtures.
Task Lighting Over Counters
Position can lights directly above countertop areas where food preparation happens. For an island kitchen, align fixtures along the length of the island, spacing them about 2 to 3 feet apart for even coverage. Stagger the grid slightly so that light does not pool directly under the cabinets but instead washes across the entire counter surface.
Avoiding Common Placement Mistakes
One of the biggest mistakes homeowners make is placing can lights too far from the walls, leaving a dark border around the perimeter of the room. Position your perimeter fixtures at least 1.5 to 2 feet from the walls to create a gentle wash of light that makes the space feel open and defined. Also avoid placing fixtures directly over the range hood or refrigerator, as this creates unflattering shadows and glare.
LED vs. CFL vs. Incandescent Can Lights for Kitchens
The light source you choose has a massive impact on energy efficiency, maintenance, and light quality. The table below compares the three primary options for kitchen can lights.
| Feature | LED Can Lights | CFL Can Lights | Incandescent Can Lights |
| Energy Efficiency | Excellent — uses up to 80% less energy | Good — uses about 75% less energy | Poor — highest energy consumption |
| Lifespan | 15,000–50,000 hours | 8,000–15,000 hours | 1,000–2,000 hours |
| Light Quality | Excellent color rendering (CRI 80+) | Good CRI but slight green cast | Warm, high CRI but limited options |
| Heat Output | Low — safe near insulation | Moderate | High — can heat up kitchen |
| Dimmability | Wide range of dimmable models | Limited compatibility | Fully dimmable |
| Upfront Cost | Moderate to high | Low | Low |
| Overall Value | Best long-term investment | Good mid-range option | Low upfront, high long-term cost |
For virtually every modern kitchen, LED can lights are the clear winner. They last dramatically longer, consume a fraction of the electricity, produce minimal heat, and now come in a wide range of color temperatures and brightness levels that rival any traditional light source. The upfront cost is slightly higher, but the energy savings and reduced replacement frequency make LEDs the smartest investment for your kitchen lighting.
Can Lights Kitchen Design Trends and Ideas
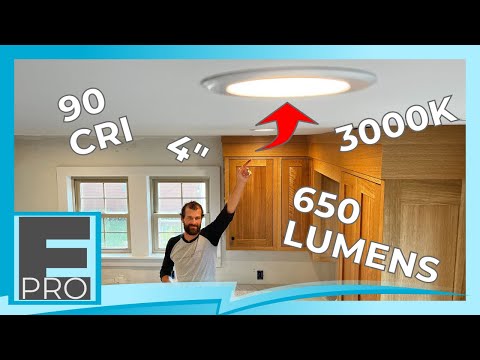
Design trends in recessed kitchen lighting have evolved significantly in recent years. Here are some of the most popular approaches that homeowners and interior designers are embracing right now.
- Linear Can Light Grids: Instead of a traditional rectangular grid, many modern kitchens use linear rows of can lights that follow the shape of the room or island, creating dynamic lines of light that add architectural interest.
- Mixed Trim Finishes: Combining matte black, brushed nickel, and white trims in a single kitchen adds visual depth and allows fixtures to complement different cabinet and hardware finishes.
- Two-Layer Can Lighting: Using a combination of larger 5-inch fixtures for ambient light and smaller 4-inch fixtures for task lighting creates a sophisticated two-tier approach that maximizes both function and style.
- Smart Can Lights: Smart LED recessed fixtures that integrate with home automation systems like Alexa, Google Home, and Apple HomeKit allow you to control brightness, color temperature, and scheduling from your phone or voice commands.
Installation Tips and Common Mistakes to Avoid
While some homeowners tackle can lights kitchen installation themselves, it is important to approach the project with care. Electrical work in kitchens carries real safety risks, especially given the proximity to water sources. If you are not confident in your electrical skills, hiring a licensed electrician is always the right call.
If you do decide to DIY, here are critical tips to follow. First, always turn off the power at the breaker and verify it with a voltage tester before touching any wires. Second, use a ceiling fish tape to route wiring cleanly between joists. Third, ensure each fixture box is rated for the weight of the can light and any support wiring. Fourth, maintain proper clearance from combustible materials — at least 3 inches for non-IC rated fixtures and no minimum for IC-rated ones, but always check the manufacturer’s specifications. Finally, seal any penetrations around the fixtures with airtight housings or foam gaskets to prevent air leaks, which can significantly impact your kitchen’s energy efficiency.
Expert Tips for Maximizing Your Kitchen Can Lights
Even the best can lights will underperform without proper planning. Here are expert recommendations that separate a mediocre installation from a truly outstanding one.

- Pair your can lights with under-cabinet LED strips to eliminate shadows on countertops completely.
- Use 2700K to 3000K bulbs over dining areas and 3500K to 4000K bulbs over prep zones for the most comfortable and functional lighting scheme.
- Install a dedicated dimmer switch for each zone of can lights rather than a single whole-room dimmer for precise control.
- Choose fixtures with a deep housing depth for better light distribution and reduced glare.
- Consider adding a few accent can lights angled toward open shelving or backsplash tiles to create visual depth and highlight design features.
Frequently Asked Questions
How many can lights do I need for a standard kitchen?
A good starting point is one can light for every 4 to 6 square feet of kitchen space. For a 120-square-foot kitchen, you would typically need between 20 and 30 fixtures depending on ceiling height and desired brightness level. Adjust this number based on the lumens output of your specific LED bulbs and whether you are using the lights for ambient or task purposes.
What size can lights are best for kitchen ceilings under 8 feet?
For ceilings under 8 feet, 4-inch can lights are generally the best choice. They provide sufficient light without making the ceiling feel crowded or lowering the perceived height of the room. If you need more light output, 5-inch fixtures are a reasonable upgrade, but avoid 6-inch cans in low-ceiling kitchens as they can create a heavy, oppressive look.
Can can lights be used as the sole light source in a kitchen?
Yes, can lights can serve as the primary or sole overhead light source in a kitchen, but most designers recommend supplementing them with under-cabinet lighting for task areas. A kitchen lit only by recessed ceiling fixtures often has shadows under upper cabinets where counter work happens, which can be frustrating during food preparation. The ideal setup combines can lights for ambient coverage with dedicated task lighting in shadow-prone areas.
Are can lights expensive to install in a kitchen?
The cost varies significantly based on whether you are doing new construction or a retrofit and whether you hire a professional. New construction can lights are generally less expensive per unit because installation is simpler. Retrofit fixtures and professional installation will cost more upfront but save you from the disruption of a full ceiling tear-out. On average, homeowners spend between $100 and $300 per fixture including labor for a retrofit installation, so a full kitchen layout of 20 to 30 fixtures could range from $2,000 to $9,000 total.
How do I prevent can lights from making my kitchen feel too harsh?
The key is choosing the right bulb and trim combination. Baffle trims with frosted LED bulbs at 3000K create a soft, diffused light that is flattering and comfortable. Dimmers are essential — they let you dial down brightness for evenings and casual dining. Additionally, spacing fixtures slightly farther apart than the standard grid recommendation reduces the number of visible pools of light and creates a more natural, layered feel.
Conclusion
Can lights are one of the most impactful upgrades you can make to any kitchen. They offer an ideal blend of form and function — delivering clean, modern aesthetics while providing the precise, versatile illumination that a kitchen demands for everything from early-morning coffee prep to dinner party entertaining. By choosing the right fixture types, sizing them appropriately for your space, planning a thoughtful layout, and pairing them with quality LED bulbs and smart controls, you can create a kitchen that is not only beautiful but truly a joy to work and gather in. Invest the time in planning your can lights kitchen design carefully, and the results will serve you beautifully for years to come.