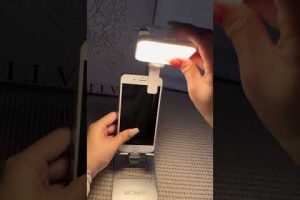
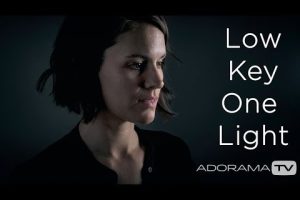
LED lighting for photography has completely transformed the way photographers approach illumination, whether they are shooting in a studio or on location. Unlike traditional strobes, tungsten bulbs, or fluorescent tubes, modern LED panels deliver consistent, adjustable, and energy-efficient light that adapts to virtually any creative scenario. If you are building a lighting kit from scratch or upgrading your existing gear, understanding what makes LED the dominant choice in today’s photography world is essential. This guide covers everything from the science behind LED panels to practical setup recommendations for beginners, intermediate users, and advanced professionals looking to maximize their creative potential.
Why LED Lighting Has Become the Go-To Choice for Photographers
The shift toward LED continuous lighting in photography is not just a trend — it is a fundamental improvement in how light is controlled and deployed. Photographers have embraced LED panels because they offer real-time preview of lighting setups, meaning you can see exactly how shadows fall and how highlights interact with your subject before pressing the shutter. This alone saves enormous amounts of time during a shoot, especially in commercial and portrait sessions where precision matters.
Beyond the visual preview advantage, LEDs are remarkably energy efficient. A single LED panel can run for hours on a portable battery pack, making them ideal for on-location work where access to power outlets is limited. They also produce significantly less heat compared to traditional strobes or tungsten lights, which means your subjects stay comfortable during long sessions and your lighting equipment remains safe to touch.
- Real-time lighting preview without test shots
- Low heat output keeps models comfortable
- Portable battery-powered operation for field work
- Energy-efficient design reduces power consumption
- Long lifespan — LEDs last tens of thousands of hours
How LED Panels Work for Photography
At the core of every LED photography light is a cluster of light-emitting diodes mounted on a circuit board and often housed behind a diffuser. Each diode emits light at a specific wavelength, and modern panels combine multiple colored diodes — typically cool white, warm white, and sometimes RGB or RGBW chips — to produce a full spectrum of color temperatures and hues. The result is a clean, flicker-free light source that can be tuned precisely to match your creative vision.
Most professional LED panels use a driver circuit that regulates current flow to maintain consistent brightness and color output. When you adjust the dimmer, the circuit modulates the power delivered to each LED without causing visible flicker, which is critical for avoiding banding artifacts in video and high-speed photography. The diffusion layer on the front of the panel softens the light, turning a harsh point source into a broader, more wrap-around illumination that flatters subjects and reduces unflattering shadows.
Key Features to Look for in LED Photography Lights
Not all LED panels are created equal, and choosing the right one requires understanding the specifications that directly affect image quality and creative flexibility.
Color Temperature and CRI
Color temperature, measured in Kelvin (K), determines whether your light appears warm or cool. Most LED panels offer a variable range, commonly from 2700K (warm tungsten look) to 6500K (daylight balanced). The ability to shift color temperature seamlessly is one of the biggest advantages of LED over fixed-source lights.
Equally important is the Color Rendering Index, or CRI. A CRI of 95 or above means the light renders colors accurately, which is critical for product photography, beauty work, and any scenario where skin tones or brand colors must look natural. Some premium panels also include a TM-30 color metric, which provides a more comprehensive evaluation of color fidelity than CRI alone.
Dimming and Power Output
Look for panels that offer smooth, flicker-free dimming from roughly 10% to 100% brightness. This range gives you the flexibility to use LEDs for both subtle fill light and primary key light. Power output is measured in watts, but what matters more for photography is the equivalent lux output at a given distance. A well-designed LED panel rated at 50 watts can produce enough intensity to shoot portraits at moderate apertures, while larger panel lights or LED light arrays can handle even outdoor fill work during golden hour.
Best LED Lighting Setups for Different Photography Styles
Portrait Photography LED Lighting
For portrait work, a two-light LED setup is often the sweet spot. Use a larger soft LED panel as your key light positioned at a 45-degree angle to the subject, and a smaller panel or LED strip as a subtle hair or background light. The continuous nature of LEDs lets you and your model see exactly how the light sculpts the face in real time, making it easier to fine-tune positioning for flattering results.
- Position a 30×60 cm LED soft panel as the key light at 45 degrees
- Add a small LED fill reflector or second panel on the opposite side at reduced power
- Use a battery-powered LED light for rim or hair lighting from behind
- Adjust color temperature to match the mood — warmer tones for cozy editorial looks, cooler for high-fashion work
Product Photography LED Lighting
Product photography demands color accuracy and even illumination. LED panels with high CRI (95+) and adjustable color temperature are indispensable here. A common approach involves using two identical LED panels set at equal intensity on either side of the product at roughly 30 degrees above the subject plane, combined with a reflector or white backdrop to control contrast.
Video and Hybrid Photography LED Lighting
If you shoot both stills and video, LED lights are the natural choice because they provide continuous light that works perfectly for both mediums. Panels with built-in RGB capability allow you to add colored accent lighting for creative video work without needing additional gel filters. Look for features like the Bowens mount or standard cold shoe adapters for compatibility with softboxes, fresnel lenses, and other modifiers.
LED vs. Other Lighting Types: A Comparison
Understanding how LED lights compare to traditional photography lighting options helps you make informed gear decisions.
| Feature | LED Panels | Strobe / Flash | Tungsten |
| Real-time preview | Yes | No (test shots needed) | Yes |
| Heat output | Low | Moderate (flash tube) | Very high |
| Power efficiency | Excellent | Moderate | Poor |
| Color temperature range | Fully adjustable | Fixed or with gels | Warm (fixed ~3200K) |
| Portability | Excellent | Moderate | Heavy, bulky |
| Cost | Mid to high | Mid range | Low to mid |
| Battery operation | Yes (many models) | No | Rarely |
| Lifespan | 50,000+ hours | ~5,000 flashes | ~1,000 hours |
The table above highlights why LED has become the most versatile and practical option for modern photographers. While strobes still hold an edge in raw power output for freezing fast action outdoors, the convenience, flexibility, and creative control of continuous LED lighting make it the preferred choice for the vast majority of shooting scenarios.
Expert Tips for Getting the Most Out of LED Lights
Even the best LED panel will underperform if you do not use it correctly. Here are professional tips that separate good results from great ones.
- Always use diffusion. Even the highest-quality LED panel produces a slightly directional light. Attaching a softbox, diffusion panel, or even a sheer white fabric will dramatically improve the quality of light on your subject.
- Mind the angle. Position your LED light at roughly 45 to 60 degrees from the subject for classic portrait lighting. Avoid placing it directly in front, which creates flat, uninteresting images, or directly behind, which causes lens flare unless you are intentionally going for a rim light effect.
- Balance ambient light. LEDs work best when you intentionally balance them with existing environmental light. Use your camera’s white balance settings to match the LED color temperature to any available light sources in the scene.
- Invest in a light meter. Although LEDs are continuous, using a handheld incident light meter ensures consistent exposure across multiple shots and helps you replicate setups later.
- Keep panels clean and cool. Dust can accumulate on LED surfaces and diffusers, reducing light output slightly. Ensure adequate ventilation around panels during long shoots, even though LEDs produce less heat than alternatives.

Final Thoughts on LED Lighting for Photography

LED lighting has earned its position as the most versatile and practical illumination tool available to photographers today. From compact battery-powered panels that fit in a camera bag to large rectangular soft lights capable of illuminating entire studio sets, the range of LED options ensures there is a solution for every budget and every creative need. Whether you are a beginner building your first lighting kit or an experienced professional seeking more control and efficiency, investing in high-quality LED photography lights delivers immediate and lasting returns in image quality, workflow speed, and creative freedom. The key is to focus on features like color temperature adjustability, high CRI ratings, and sufficient dimming range — and to practice with your lights until you understand exactly how they shape the images you create.
Frequently Asked Questions
What is the best color temperature for LED photography lighting?
The ideal color temperature depends on your subject and mood, but 5500K to 5600K is the most commonly used setting because it matches average daylight. For warmer, more intimate portraits, dialing down to 3200K to 4000K creates a cozy, flattering look. The beauty of LED panels is that you can adjust on the fly without swapping bulbs or gels.
Can LED lights be used for both photography and video?
Absolutely. Continuous LED lights are designed to work seamlessly for both still photography and video production. They provide consistent illumination that allows for real-time monitoring of exposure and color balance, making them a staple in hybrid shooting workflows.
How many watts do I need in an LED panel for portraits?
For most indoor portrait setups, a panel producing between 800 and 2000 lux at one meter distance is sufficient. This typically corresponds to panels rated between 30 and 65 watts of power draw. Larger panels or higher-output models are better suited for filling larger scenes or working outdoors where ambient light is strong.
What does CRI mean and why does it matter for LED lights?
CRI stands for Color Rendering Index, and it measures how accurately a light source reproduces colors compared to natural sunlight. A CRI rating of 95 or above ensures that skin tones, fabric colors, and product hues appear natural and true to life in your photographs. Lower CRI values can result in dull or shifted colors that are difficult to correct in post-processing.
Are battery-powered LED panels good for on-location shoots?
Yes, battery-powered LED panels are excellent for on-location work. They free you from needing access to wall outlets and allow you to set up lights in remote or challenging environments. Look for panels that support V-mount or NP-F batteries, and consider carrying a backup battery for full-day shoots.