Lighting is the single most transformative element in photography. Whether you are capturing sweeping landscapes at dawn or setting up a controlled studio portrait, understanding how light behaves can separate a forgettable snapshot from a breathtaking image. Great lighting for photography is not about owning the most expensive gear — it is about knowing how to shape, control, and direct light to reveal texture, mood, and depth. In this comprehensive guide, we will explore every facet of photography lighting, from natural light techniques to advanced artificial setups, giving photographers at every level the tools and insights they need to dramatically improve their work.
Why Lighting Matters So Much in Photography

At its core, photography literally means “drawing with light.” Every photograph you take is a record of how photons interact with your subject and hit your camera’s sensor. The quality, direction, color temperature, and intensity of that light determine the entire mood and technical quality of your image. Harsh overhead lighting creates unflattering shadows and blown-out highlights, while soft, diffused light wraps around a subject and reveals subtle tonal gradations. Mastering light means mastering the visual language of your photographs.
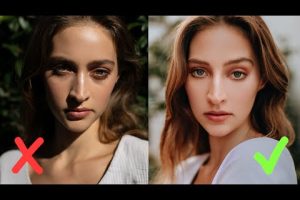
Consider two portraits taken with the exact same camera and lens — one lit with direct midday sun and one lit during golden hour with a reflector. The differences in skin texture, color rendering, and emotional impact are staggering. This is why seasoned photographers invest disproportionate time studying lighting rather than obsessing over camera bodies or megapixel counts.
Types of Natural Lighting for Photography
Natural light is the most accessible and arguably the most beautiful light source available. Learning to read and work with it is a foundational skill every photographer should develop.
Golden Hour and Blue Hour
Golden hour — the period shortly after sunrise and before sunset — bathes subjects in warm, low-angle light that is soft and flattering. Blue hour, which occurs just before sunrise and after sunset, offers cool, diffused tones perfect for moody and cinematic imagery. Both windows of time provide forgiving light that minimizes harsh shadows and reduces squinting in portrait sessions.
Overcast and Diffused Light
Cloudy skies act as a massive natural softbox, scattering light evenly across your scene. This eliminates hard shadows and is ideal for portrait and product photography where you want clean, even illumination without dramatic contrast.
Window Light
One of the most powerful yet underrated lighting tools is a simple window. Directing a subject beside a large window creates a natural key light with beautiful gradations. Adding a sheer curtain further softens the light, producing results that rival professional studio setups — all without a single piece of equipment.
Understanding Artificial Lighting for Photography
While natural light is magical, artificial lighting gives you complete control over your images regardless of time or weather. Here is a breakdown of the primary artificial lighting options available to photographers.
Strobes and Speedlights
Strobes deliver powerful, short bursts of light ideal for freezing motion and achieving sharp exposures. Speedlights are the portable, on-camera version that many photographers use for event and wedding photography. Both can be fired remotely via wireless triggers, allowing complex multi-light setups.
Continuous Lighting
LED panels and continuous studio lights remain powered on, making it easier to visualize shadows and highlights before clicking the shutter. They are especially popular for video work and beginners who want to see exactly how their light shapes the subject in real time.
Light Modifiers
Raw light from a strobe or speedlight is almost always too harsh for professional results. Light modifiers — including softboxes, umbrellas, beauty dishes, and grids — reshape the quality of your light. A softbox creates soft, directional light perfect for portraits. A beauty dish produces a unique blend of soft illumination with punchy highlights. A grid or snoot narrows the spread of light, allowing you to isolate subjects and control spill.
| Modifier | Light Quality | Best For |
| Softbox | Soft, even wrap | Portraits, product photography |
| Umbrella | Broad, scattered | Group shots, large areas |
| Beauty Dish | Contrasty yet soft | Fashion, beauty portraits |
| Grid / Snoot | Focused, directional | Dramatic effects, background control |
| Barn Doors | Precise beam control | Theater-style lighting, highlights |
Essential Lighting Setups and Patterns
Once you understand your light sources, the next step is learning classic lighting patterns that have been used by photographers for decades. These patterns define the placement of your key light relative to your subject and create distinct emotional and aesthetic effects.
Rembrandt Lighting
Named after the Dutch master painter, Rembrandt lighting features a distinctive triangle of light on the shadowed cheek of your subject. It is achieved by positioning the key light at approximately 45 degrees to the side and slightly above eye level. This pattern creates dramatic, moody portraits with a strong sense of depth and dimension.
Butterfly Lighting
Also known as Paramount lighting, this technique places the key light directly in front of and above your subject, creating a butterfly-shaped shadow beneath the nose. It is a favorite in fashion and glamour photography because it emphasizes cheekbones and creates a glamorous, high-fashion aesthetic.
Rim Lighting and Backlighting
Placing a light behind your subject creates a luminous edge or rim that separates them from the background. This technique is incredibly effective for silhouette photography, sports portraits, and dramatic editorial work. It adds a professional, polished look that instantly elevates the perceived quality of your images.
Three-Point Lighting Setup
The three-point lighting system is the backbone of studio photography. It consists of a key light, a fill light, and a backlight (or hair light). The key light provides the primary illumination, the fill light softens shadows created by the key, and the backlight adds separation and depth. This setup is endlessly adjustable and works for virtually any subject matter.
- Key Light — The dominant source that defines the overall mood and shadow direction.
- Fill Light — Positioned opposite the key light, it reduces contrast and opens up shadow areas.
- Backlight / Hair Light — Placed behind the subject, it creates separation from the background.
Best Lighting Equipment Recommendations
Choosing the right lighting gear depends on your budget, shooting style, and experience level. Below are some trusted recommendations across categories.
- Godox AD200 Pro — A versatile, portable strobe perfect for on-location shoots and beginners stepping into artificial lighting.
- Profoto B10 — A premium battery-powered strobe offering exceptional output and color consistency for studio and location work.
- Aputure 300d Mark II — A favorite among videographers and photographers alike for its flicker-free continuous light output.
- Neewer 660 LED Panel — An affordable entry-level continuous light that delivers surprisingly beautiful results for product and portrait work.
- Westcott Rapid Box — A portable softbox that collapses for travel, making it ideal for photographers who shoot on location.
Expert Tips for Improving Your Photography Lighting

Even the most basic lighting setups can produce stunning results when you apply these professional techniques:
- Shoot during the blue hour if you want moody, cinematic tones with balanced exposure between sky and foreground.
- Use a reflector to bounce natural light back onto shadow areas. A simple white foam board costs under ten dollars and makes a massive difference.
- Watch the color temperature — mix daylight and tungsten light sources carefully, or embrace the creative contrast intentionally.
- Move your light, don’t just rotate your subject. Subtle changes in light position create dramatically different shadow patterns and moods.
- Shoot tethered when possible. Seeing your images on a larger screen in real time helps you spot exposure and lighting issues instantly.
- Experiment with negative fill. Placing a black card opposite your light source deepens shadows and adds cinematic contrast to your portraits.
Frequently Asked Questions About Photography Lighting
What is the best lighting for beginner photographers?
Natural window light is the best starting point for beginners because it is free, abundant, and teaches you to observe how light direction and quality affect your images. Pairing a single speedlight with a basic softbox is the next logical step for those ready to explore artificial lighting without overwhelming complexity.
How do I achieve flattering lighting for portraits?
Flattering portrait lighting typically involves soft, directional light placed at a 45-degree angle to the subject. Using a large modifier like a softbox or an umbrella creates a broad, gentle light source that wraps around the face and minimizes skin imperfections. Always avoid placing the key light directly in front of or directly above the subject, as both positions produce unflattering results.
What is the difference between hard light and soft light?
Hard light comes from a small, concentrated source and creates sharp, defined shadows with high contrast — think direct midday sun. Soft light originates from a large source relative to your subject and wraps around surfaces, producing gradual shadow transitions and lower contrast. The size and distance of your light source relative to the subject determine whether the light is hard or soft, not the intensity.
Can I use a smartphone flash for decent photography lighting?
Built-in smartphone flashes produce harsh, flat light that almost always looks amateurish. However, you can improve results significantly by diffusing the flash with a small bounce card or by using a clip-on LED light panel with adjustable color temperature. For the best results, always rely on natural light or invest in a dedicated external flash unit.
How do I light a product photography setup at home?
A simple product photography setup requires two identical light sources placed at 45-degree angles to either side of the product, each firing through a white softbox. Remove all other light sources from the room to maintain full control. A white poster board beneath the product acts as a bounce surface, filling the bottom shadow and creating a clean, professional look.
Conclusion
Great lighting for photography is not a luxury — it is a necessity. Whether you are working exclusively with window light or building an elaborate multi-studio setup, the principles remain the same: control your light direction, shape it with modifiers, and always consider the emotional impact of the shadows you create. Start by mastering one technique at a time, practice consistently, and watch as your images transform from ordinary to extraordinary. The best camera in the world cannot compensate for poor lighting, but a skilled photographer armed with even basic lighting knowledge can produce images that captivate, inspire, and endure.