


When it comes to capturing stunning visuals, camera lighting equipment is the single most transformative investment a photographer or videographer can make. Whether you are shooting portraits in a studio, filming a YouTube video in a home setup, or running a full-scale commercial production, the quality of light you use directly determines the mood, depth, and professionalism of every frame. Despite the sophistication of modern cameras, no sensor can fully compensate for poor lighting. In this comprehensive guide, we will explore the types of photography lighting gear available, break down the features that matter most, and give you actionable recommendations for building a lighting setup that works for your skill level and budget.
What Is Camera Lighting Equipment and Why Does It Matter?
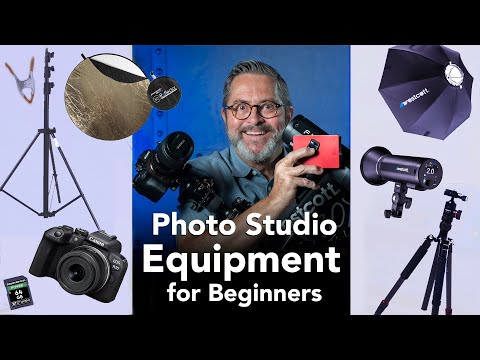
Camera lighting equipment refers to all devices and accessories designed to control, shape, and enhance the light used in photography and videography. This category includes everything from basic on-camera flashes to elaborate multi-light studio rigs. Unlike natural light, artificial lighting gives creators complete control over intensity, direction, color, and quality of illumination. Understanding video lighting setup fundamentals allows you to eliminate harsh shadows, bring out skin tones accurately, and create cinematic depth that draws viewers into the scene.
The importance of proper lighting cannot be overstated. A technically perfect composition shot with flat or unbalanced light will always look inferior to a well-lit image with moderate composition. Lighting shapes the emotional tone of a photograph — soft, diffused light creates a dreamy and romantic atmosphere, while hard, directional light adds drama and texture. For video producers, consistent and adjustable lighting for content creators ensures continuity across shots and maintains a polished, professional finish.
Types of Camera Lighting Equipment
The world of photography lighting is diverse, and choosing the right category depends on your subject matter, shooting environment, and creative goals. Below are the primary types of lighting gear that every creator should understand.
Continuous Lighting

Continuous lights remain on throughout the shoot, making them ideal for beginners who want to see exactly how light falls on their subject in real time. These include LED panels, tungsten bulbs, and fluorescent tubes. Continuous lighting is especially popular for video production lighting because it eliminates the need to synchronize flashes with camera shutters. Brands like Aputure, Godox, and Nanlite have made high-quality continuous LED lights accessible at every price point.

Strobe and Flash Lighting
Strobe lighting delivers short, powerful bursts of light, allowing photographers to freeze motion and achieve extremely bright exposures. Speedlights and monolights are the two most common forms of studio strobes. Strobes are preferred for portrait lighting setups because they can produce crisp, well-defined shadows and allow precise control over depth of field through powerful output. The trade-off is that strobes require more setup time and testing, since you cannot see the light effect until the flash fires.
LED Panels and Softboxes
LED panel lights have revolutionized lighting for content creators by offering lightweight, energy-efficient, and highly adjustable illumination. When paired with light modifiers such as softboxes, umbrellas, and beauty dishes, LED panels can produce everything from ultra-soft wrap-around light to focused beams for dramatic effects. Softboxes diffuse light through translucent fabric, reducing harsh shadows and creating flattering illumination perfect for close-up portraits and product photography.
Key Features to Consider When Choosing Lighting Gear
Not all camera lighting equipment is created equal. Before purchasing, evaluate these critical specifications to ensure you invest in gear that matches your needs.
Color Temperature and CRI Rating
Color temperature, measured in Kelvin (K), determines whether your light appears warm (yellowish), neutral (white), or cool (bluish). Most photography lighting equipment operates between 3200K and 5600K. Equally important is the CRI (Color Rendering Index) rating, which measures how accurately a light source reproduces colors compared to natural sunlight. A CRI of 95 or above is ideal for video production lighting where skin tones must look natural and true to life.
Power Output and Dimming Capability
Light output is measured in watt-seconds (for strobes) or lumens (for LEDs). Higher output gives you more flexibility to light large scenes or shoot from greater distances. However, adjustable dimming is just as important as raw power because it allows you to fine-tune brightness for subtle, realistic setups. Look for lighting units that offer smooth dimming curves and multiple power modes to adapt to different shooting conditions.
Portability and Modularity
For creators who shoot on location, portable lighting solutions are essential. Lightweight LED panels that run on rechargeable batteries or standard power banks offer incredible versatility. Consider whether your lighting system supports modular expansion — the ability to add light modifiers, stands, and wireless triggers as your skills grow.
Comparison Table: Best Camera Lighting Equipment by Category
| Category | Best For | Key Advantage | Price Range |
| LED Panels | Videography, vlogging, run-and-gun shooting | Real-time preview, lightweight, low power consumption | $50 – $500 |
| Studio Strobes | Studio portraits, product photography | Extremely powerful output, fast recycle time | $200 – $1,200 |
| Speedlights | Event photography, on-location shoots | Compact, portable, versatile mounting options | $100 – $600 |
| Softbox Kits | Portrait lighting, product shots | Soft, diffused light that flatters subjects | $30 – $300 |
| RGB Tube Lights | Cinematic video, music videos, creative setups | Full color spectrum, wireless control via apps | $150 – $800 |
This comparison of camera lighting equipment categories helps you quickly identify which type aligns with your primary use case. Many professionals eventually build a mixed kit that combines multiple categories for maximum creative flexibility.
Expert Tips for Getting the Most Out of Your Lighting Setup
Owning quality photography lighting gear is only half the battle. How you use it determines the quality of your final results. Here are expert-backed tips that will elevate your work immediately.
- Start with the three-point lighting technique. This classic video production lighting method uses a key light, fill light, and back light to create depth and dimension. The key light is your primary source, the fill light softens shadows, and the back light separates your subject from the background.
- Always use light modifiers. A bare light source creates harsh, unflattering shadows. Softboxes, barn doors, snoots, and diffusion gels transform raw light into something cinematic and controlled. Investing in quality light modifiers dramatically improves results without increasing your budget.
- Shoot with the histogram in mind. Properly exposed lighting means preserving detail in both highlights and shadows. Overexposed lighting clips details and cannot be recovered, while underexposed shots introduce noise even with advanced noise reduction software.
- Match your light sources. Mixing light sources with different color temperatures creates color casts that are difficult to correct in post-production. Ensure all lights in your video lighting setup are set to the same Kelvin value for consistent, natural results.
- Experiment with light placement. Moving your key light just a few inches can completely change the mood of a portrait. Use the butterfly lighting technique for glamorous portraits or Rembrandt lighting for dramatic, moody imagery.
Beginner, Intermediate, and Advanced Gear Recommendations
Building a lighting kit should be a gradual process that grows with your skills.
Beginners should start with a single LED panel, a light stand, and a basic softbox. This combination costs under $150 and provides enough control to learn fundamental lighting principles. The Godox SL60W and Neewer 660 LED panels are excellent entry points for lighting for content creators.
Intermediate creators benefit from adding a second light source and a strobe or speedlight. A two-light portrait lighting setup with a key and fill dramatically improves image quality. Look into Godox AD200Pro or Aputure Amaran 200D for versatile, reliable options.
Advanced professionals often work with multi-light studio setups using monolights, wireless triggers, and a full range of light modifiers. Investing in high-output strobes like Profoto or Elinchrom, paired with precision gels and grid spots, gives you studio-grade control for commercial and editorial work.
Conclusion
Camera lighting equipment is far more than an accessory — it is the foundation upon which all great visual storytelling is built. From the simplicity of a single LED panel to the complexity of a multi-strobe studio rig, every photographer and videographer benefits from understanding how light shapes their subjects. By choosing the right photography lighting gear, mastering key features like CRI and color temperature, and applying proven lighting techniques, you can transform ordinary scenes into extraordinary images and videos. Start with the basics, experiment fearlessly, and let light become your most powerful creative tool.
Frequently Asked Questions
1. What is the best camera lighting equipment for beginners on a budget?
A basic LED panel paired with a light stand and a softbox is the ideal starting point for beginners. Options under $100 from brands like Neewer or Godox provide adjustable brightness and color temperature, making them perfect for learning video lighting setup fundamentals without overwhelming complexity.
2. What is CRI and why does it matter for photography lighting?
CRI stands for Color Rendering Index, and it measures how accurately a light source reproduces colors. A CRI of 90 or higher is recommended for camera lighting equipment used in portrait and video work because it ensures skin tones appear natural and faithful, avoiding unnatural color shifts that cheap lights often produce.
3. Can I use continuous LED lights for both photography and videography?
Yes, LED panels are the most versatile option for creators who shoot both stills and video. They allow real-time visualization of light, work with any shutter speed, and can serve as practical fill lights or primary sources. This makes them the top choice among modern lighting for content creators.
4. How many lights do I need for a professional-looking video?
A minimum of two lights — a key light and a fill light — is sufficient for most professional-looking setups. Adding a back light or hair light creates separation and adds a cinematic quality. Advanced video production lighting often incorporates three to five lights, but quality matters more than quantity.
5. What is the difference between a softbox and an umbrella as a light modifier?
A softbox directs light through a focused diffusion panel, producing controlled, directional soft light ideal for portraits and products. An umbrella spreads light more broadly and omnidirectionally, making it better for filling large areas or creating a general ambient glow. Both are essential light modifiers in any well-equipped kit.