


When you first step into the world of photography, filmmaking, or even interior design, one of the most transformative skills you can develop is understanding basic lighting. Light shapes mood, defines depth, reveals texture, and guides the viewer’s eye. Without a solid grasp of foundational lighting principles, even the most expensive equipment will fail to deliver stunning results. Whether you are a beginner setting up your first home studio or a content creator looking to refine your craft, mastering the fundamentals of basic lighting setups will elevate your work from amateur to professional in a remarkably short time. This guide dives deep into the core concepts, practical techniques, and expert strategies that form the backbone of effective lighting.
What Is Basic Lighting and Why It Matters
Basic lighting refers to the foundational techniques and principles used to position, control, and modify light sources in order to illuminate a subject effectively. It encompasses everything from the type of light you use to the angle at which it strikes your subject and the tools you employ to shape it. In photography, video production, and even stage performances, basic lighting serves as the skeleton upon which all creative decisions are built. Without proper illumination, images appear flat, colors lose vibrancy, and details dissolve into shadows or blown-out highlights.
The importance of basic lighting cannot be overstated. Consider that a single, well-placed light source can completely transform a portrait, while poor lighting can ruin an otherwise perfect composition. Lighting influences how we perceive depth, dimension, and emotion in any visual medium. It is the difference between a flat, lifeless image and a photograph that feels cinematic, three-dimensional, and emotionally compelling.
The Core Types of Light in Basic Lighting
Understanding the different categories of light is the first step toward building any effective setup. Every lighting scenario involves some combination of these fundamental types:
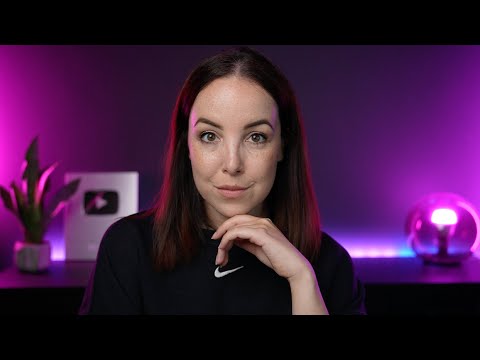
- Key Light: The primary and brightest light source in any setup. It defines the main illumination and creates the foundational shadows that give shape to your subject.
- Fill Light: A secondary light placed opposite the key light to soften harsh shadows and reduce contrast. Fill light keeps shadow areas from going completely black.
- Back Light (Rim Light): Positioned behind the subject, this light creates a luminous edge or “rim” that separates the subject from the background, adding depth and dimension.
- Background Light: Used specifically to illuminate the backdrop or environment, adding context, color, and visual interest behind the subject.
- Practical Light: Light sources that are visible within the scene itself, such as lamps, candles, or neon signs, which serve both a functional and aesthetic purpose.
Each of these light types plays a distinct role, and knowing when and how to deploy them is what separates a basic understanding from true mastery of basic lighting principles.
Key Lighting Positions and Their Roles
The placement of your light source relative to the subject dramatically changes the outcome of your image. Here are the most essential positions every lighting beginner should learn:
- Front Lighting: Placed directly in front of the subject, this minimizes shadows and creates a flat, even illumination. While useful for product photography or documentation, it lacks dramatic depth.
- Rembrandt Lighting: Positioned at approximately 45 degrees to the side and slightly above the subject, this classic technique creates a triangle of light under the eye on the shadow side of the face. It is one of the most flattering and recognizable portrait lighting patterns.
- Butterfly Lighting: Placed directly in front and above the subject, this creates a butterfly-shaped shadow beneath the nose. It is popular in glamour and beauty photography for its ability to emphasize cheekbones and jawline.
- Split Lighting: Positioned at 90 degrees to the side of the subject, this splits the face directly in half, creating a dramatic, high-contrast effect that is often used in moody or artistic portraits.
- Loop Lighting: Similar to Rembrandt but with a smaller shadow that loops off the nose without connecting to the cheek shadow. It is a versatile and forgiving setup that works for most face shapes.
Experimenting with these positions using a single light source and a reflector is the fastest way to internalize how light direction affects the final result.
Basic Lighting Setups for Different Purposes
Different creative applications demand different approaches to basic lighting. Here is a breakdown of common scenarios and the setups that work best:
Portrait Photography
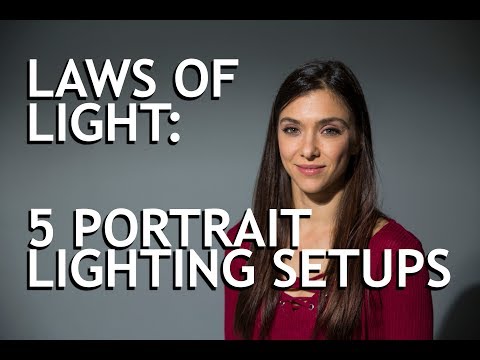
For portraits, a classic three-point lighting setup — key light, fill light, and back light — remains the gold standard. Start with a soft key light at 45 degrees, add a reflector or secondary fill light on the opposite side, and position a subtle back light to create separation from the background.
Product Photography
Product photography often relies on soft, diffused light to minimize harsh shadows and accurately represent colors and textures. A large softbox or a light tent works wonders for capturing products with clean, professional detail.
Video Content and Streaming
For video creators, consistency and skin-tone accuracy are paramount. Ring lights and LED panels with adjustable color temperature are popular choices. A two-light setup — key and fill — with a background light for depth is an excellent starting point for streaming and vlogging.
Film and Cinematic Lighting
Cinematic lighting builds on basic principles but introduces more complexity. Three-point setups are expanded with motivated lighting, colored gels, and atmospheric effects to create a specific visual tone that supports the narrative.
Comparison: Common Basic Lighting Equipment
Choosing the right equipment is a critical part of building your lighting toolkit. The table below compares some of the most commonly used tools for basic lighting setups:
| Equipment | Best For | Portability | Price Range |
| Softbox | Soft, diffused portrait and product light | Moderate | Budget to Mid |
| LED Panel | Video, streaming, and versatile on-location use | High | Budget to Premium |
| Ring Light | Beauty shots, selfies, and evenly lit portraits | High | Budget to Mid |
| Umbrella Reflector | Wide, soft fill light for studios | Moderate | Budget |
| Spot Reflector (Grid) | Focused, controlled light with minimal spill | High | Budget to Mid |
| Strobe/Flash Unit | High-powered burst lighting for photography | Moderate | Mid to Premium |
For beginners, a single LED panel combined with a softbox and a simple reflector covers the vast majority of basic lighting needs without a significant financial investment.
Expert Tips for Mastering Basic Lighting
Even seasoned professionals continue to refine their understanding of basic lighting. Here are proven tips that will accelerate your growth:
- Start with one light: Resist the temptation to add multiple sources at once. Mastering a single light teaches you more about shadow behavior, contrast, and subject rendering than any multi-light setup ever could.
- Use a reflector before adding a second light: A simple white or silver reflector can serve as an effective fill light, saving you money and simplifying your setup.
- Pay attention to light modifiers: Diffusers, barn doors, snoots, and gels fundamentally change the quality and direction of light. Each modifier serves a specific creative purpose.
- Shoot in manual mode: Auto exposure settings can be fooled by mixed lighting sources. Manual control gives you consistent, predictable results every time.
- Learn to read light: Before turning on any equipment, visualize where shadows will fall. Sketching or mentally mapping your setup helps you anticipate results and troubleshoot faster.
- Observe natural light: Studying how sunlight behaves at different times of day — golden hour, overcast conditions, harsh midday sun — provides an invaluable education in how light interacts with surfaces and subjects.
Common Mistakes Beginners Make with Basic Lighting
Avoiding these pitfalls will save you countless hours of frustration:
- Placing the light directly in front of the subject: This creates flat, unflattering images with no dimension or depth.
- Ignoring the color temperature: Mixing warm and cool light sources without correction creates unnatural skin tones and visual confusion.
- Using too much light: Overpowering a scene eliminates natural contrast and makes images feel artificial and clinical.
- Neglecting the background: A poorly lit background distracts from the subject and flattens the overall composition.
- Skipping the test shot: Always review your image before the final shoot. Small adjustments to light position or intensity can make enormous differences.
FAQ: Frequently Asked Questions About Basic Lighting
What is the simplest basic lighting setup for beginners?
The simplest basic lighting setup for beginners consists of a single adjustable LED light, a cheap light stand, and a white foam-core reflector. Position the light at a 45-degree angle to the subject and use the reflector on the opposite side to bounce light back into the shadows. This three-element configuration — light, stand, and reflector — can produce professional-quality results without any additional equipment or complexity.
What is the difference between hard light and soft light in basic lighting?
Hard light comes from a small, focused source and creates sharp, well-defined shadows with high contrast. Soft light originates from a larger or diffused source and produces gradual shadow transitions with lower contrast. The key difference lies in the relative size of the light source compared to the subject. A bare bulb creates hard light, while the same bulb inside a large softbox creates soft light. Understanding this distinction allows you to choose the right quality of light for your creative intent.
How do I choose the right color temperature for basic lighting setups?
Color temperature, measured in Kelvin (K), determines the warmth or coolness of your light. Daylight-balanced light sits around 5500K, while tungsten light is warmer at approximately 3200K. Match your light temperature to your ambient environment or use gel filters to correct mismatches. For mixed-light scenarios, set your camera’s white balance to match your primary light source and adjust as needed during post-processing for consistency across shots.
Can I achieve basic lighting with natural light alone?
Absolutely. Natural light is one of the most powerful and accessible tools for basic lighting. Positioning your subject near a large window with sheer curtains diffuses harsh sunlight into a beautiful, soft key light. Reflectors placed outside the window can fill shadows and add dimension. Many stunning portraits, product shots, and even cinematic scenes have been created using nothing but natural light and simple modifiers like white bedsheets or foam boards.
What is the inverse square law and how does it affect basic lighting?
The inverse square law states that the intensity of light decreases proportionally to the square of the distance from the source. In practical terms, this means that doubling the distance between your light and the subject reduces the light intensity to one-quarter. This principle is crucial for controlling exposure and contrast. Moving a light slightly closer or farther creates dramatic changes in brightness and shadow softness, making distance one of the most powerful — and often overlooked — variables in basic lighting control.
Conclusion
Basic lighting is far more than a technical necessity — it is a creative language that allows you to communicate mood, depth, and emotion through visual storytelling. By understanding the core types of light, mastering key positions, selecting the right equipment, and avoiding common pitfalls, you build a foundation that supports every creative project you will ever undertake. Start simple, experiment relentlessly, and never underestimate the transformative power of a single, well-placed light source. The journey from understanding basic lighting to creating breathtaking, professionally lit images begins with curiosity and the willingness to learn one principle at a time.