When you step onto a photo shoot, whether it is a controlled studio session or a chaotic outdoor wedding, achieving the perfect exposure can feel like chasing a moving target. The difference between a flat, lifeless image and a vibrant, dynamic photograph often comes down to one crucial element: how you measure the light. This is where incident light meter photography enters the picture, offering a level of precision that built-in camera meters simply cannot match. An incident light meter reads the light falling on your subject rather than the light bouncing off of it, providing an objective exposure baseline that remains consistent regardless of the subject’s color, reflectivity, or background complexity. If you are serious about mastering photographic exposure and elevating your image quality, understanding how to use an incident light meter is an absolute game-changer for your creative workflow.
What Is an Incident Light Meter?
An incident light meter is a specialized handheld device designed to measure the intensity of light falling onto a subject. Unlike the reflective meters built into every modern DSLR and mirrorless camera, which measure the light bouncing off the scene, an incident meter sits right next to the subject, facing the camera, and measures the actual illumination of the light source. This method captures the true light conditions the subject is experiencing, making it completely immune to the misleading readings caused by overly bright or dark backgrounds. Whether you are using a vintage Gossen meter or a modern Sekonic model, the core principle remains the same: measure the light that illuminates, not the light that reflects.
When you use an incident meter, you place the dome-shaped lumisphere over the light sensor. This hemisphere captures light coming from all directions, including the key light, fill light, and ambient light surrounding the subject. By averaging this incoming light, the meter calculates the optimal exposure settings—aperture, shutter speed, and ISO—that will render the subject with a middle-gray tone, which is the standard baseline for photographic exposure. This process eliminates the guesswork that often plagues photographers working in complex lighting environments, giving you a reliable reference point every single time.
Why Use an Incident Light Meter?
There is a common misconception that modern digital cameras have made manual exposure obsolete. While through-the-lens TTL reflective meters are incredibly sophisticated, they are still easily fooled by scenes with extreme contrast. If you are photographing a snow-covered landscape or a person wearing a black tuxedo, your camera’s reflective meter will struggle, resulting in underexposed snow or overexposed dark clothing. Incident metering eliminates this frustrating guesswork entirely.

Here are the core reasons why incident light meter photography should be an integral part of your professional workflow:
- Consistency in variable lighting: Whether the background is a blinding white studio wall or a dark forest, your subject’s exposure remains perfectly balanced because the meter reads only the light falling on them, completely ignoring the backdrop.
- Accurate portrait photography: Skin tones are notoriously difficult to meter reflectively. An incident meter ensures your subject’s skin is exposed accurately every time, regardless of their makeup, clothing color, or skin tone.
- Studio efficiency: When setting up multiple flashes in a studio environment, an incident meter allows you to balance lighting ratios quickly, saving precious time during the shoot and ensuring a polished final result.
- Eliminating metering errors: You no longer have to worry about spot-metering the wrong part of the frame or constantly adjusting exposure compensation dials to battle misleading camera algorithms.
Incident vs. Reflected Metering
Understanding the fundamental difference between these two metering modes is essential for any photographer looking to master exposure control. The chart below highlights how each method operates and where it excels in different shooting scenarios.

| Feature | Incident Metering | Reflected Metering |
| Measures | Light falling on the subject | Light bouncing off the subject |
| Placement | Next to the subject, facing the camera | Inside the camera, pointing at the scene |
| Background Influence | None | Highly influential |
| Subject Color Influence | None | Highly influential |
| Best For | Portraits, studio work, high-contrast scenes | General photography, landscape, quick snapshots |
| Speed | Slightly slower (requires physical placement) | Instant (built directly into the camera) |
How to Use an Incident Light Meter
Using a handheld incident meter is straightforward once you understand the basic mechanics. It transforms the often confusing math of exposure into a simple, physical process that anyone can learn quickly with a little practice.
Setting Up Your Handheld Light Meter
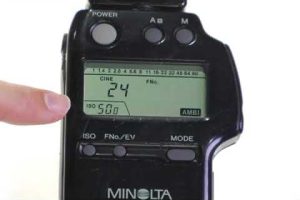
Before taking any readings, ensure your incident light meter is calibrated to the correct ISO and shutter speed. Most handheld meters, like the popular Sekonic L-308 or Gossen Digisix, allow you to set these parameters directly on the device. The ISO represents the sensor’s sensitivity, while the shutter speed will be dictated by your camera’s sync speed or your creative choice for motion control. Once these base settings are dialed in, the meter is ready to calculate the perfect aperture for the lighting conditions you are working with.
Taking the Reading in Ambient Light
To take a standard incident reading, hold the meter at the subject’s position, right next to them, pointing the lumisphere directly back toward the camera. Ensure the meter is not casting a shadow over the dome, as this will block incoming light and skew the reading. Press the measure button, and the meter will instantly display the correct aperture for your chosen shutter speed. If you are shooting in a mixed-lighting environment with both window light and artificial sources, take separate readings for the key light and the fill light to understand the lighting ratios before you click the shutter.
Advanced Techniques for Incident Metering
Once you have mastered the basics of incident light meter photography, you can begin using it for highly advanced creative control that sets professional photographers apart from amateurs.
Measuring Lighting Ratios in Studio Flash
In studio photography, lighting ratios dictate the contrast and mood of the final image. To measure these ratios, take an incident reading of your key light by itself, placing the dome right next to the subject and pointing it at the flash head. Then, take a second reading of your fill light or ambient background from the exact same position. The difference in stops between these two readings determines your lighting ratio. For example, if the key light reads f/8 and the fill light reads f/4, you have a 2:1 lighting ratio, resulting in a soft, flattering image ideal for beauty or traditional portrait work. Conversely, an 8:1 ratio creates deep, dramatic shadows perfect for cinematic or high-fashion imagery that demands intense contrast.
Using Incident Meters for Flash Photography
When working with off-camera flash or complex strobe setups, reflective meters struggle to give accurate pre-visualization of the final image. An incident meter shines in this scenario because it isolates the flash output hitting the subject directly. By taking an incident flash reading, you can instantly know the precise power output your flash needs to be at, allowing you to fine-tune your lighting setup in seconds rather than chimping your LCD screen and adjusting blindly. This method ensures that your flash-to-subject distance and modifier choices are perfectly dialed in before the session begins, giving you total confidence in your exposure.
Top Incident Light Meters on the Market
If you are ready to invest in a handheld meter, the market offers a few standout options that cater to different experience levels and budgets. Choosing the right one depends on whether you need basic ambient readings or advanced flash coordination for your specific genre of photography.
- Sekonic L-308X-U Flashmate: The industry standard for many working professionals. It is incredibly fast, features a built-in color meter, and handles both ambient and flash metering flawlessly, making it a versatile tool for any shooting scenario you might encounter.
- Gossen Digisix 2: A fantastic option for beginners or photographers on a budget. It is compact, reliable, and incredibly easy to use without sacrificing accuracy, offering excellent value for those just starting out in the craft of professional lighting.
- Sekonic L-858D-U SpectraMaster: The top-tier choice for landscape and architectural photographers. It includes a built-in spectrophotometer, allowing it to measure the color temperature of the light source with extreme precision for critical white balance adjustments in mixed lighting.
Conclusion
Mastering incident light meter photography is not just about technical perfection; it is about reclaiming creative control over your images. By shifting the measurement of light from what the camera sees to what the subject experiences, you bypass the limitations of reflective metering and achieve exposure consistency that is impossible to replicate with automated modes. Whether you are a seasoned studio shooter or an enthusiast looking to improve your portrait work, incorporating a handheld incident meter into your toolkit will fundamentally change the way you see and capture light. Embrace the precision, and watch your photography transform into a deliberate, highly controlled art form.
Frequently Asked Questions
What is an incident light meter used for in photography?
An incident light meter is used to measure the light falling onto a subject rather than the light reflecting off of it. This provides an objective exposure reading that is completely immune to the colors and brightness of the background, ensuring perfectly balanced exposures in portrait and studio photography regardless of the scene’s reflectivity or tonal values.
How do you use an incident light meter for portraits?
To use an incident light meter for portraits, place the meter at the subject’s position, right next to them, with the white dome facing directly back toward the camera lens. Take the reading, and the meter will give you the optimal aperture or shutter speed combination for the light falling on their face, guaranteeing accurate skin tones every time without worrying about their clothing color.
What is the difference between incident and reflected metering?
The primary difference lies in what they measure. Reflected metering, found in all cameras, measures the light bouncing off the subject and can be easily fooled by dark or bright backgrounds. Incident metering measures the light falling on the subject from the camera’s perspective, making it highly accurate and consistent regardless of the scene’s tonal values or contrast levels.
Can you use an incident light meter for flash photography?
Yes, incident light meters are excellent tools for flash photography. When using strobes or off-camera flash, an incident meter placed at the subject’s position facing the flash head will accurately measure the flash output, allowing you to balance multiple light sources and set precise lighting ratios without relying on the camera’s TTL system.
Which incident light meter is best for beginners?
For beginners, the Sekonic L-308X-U Flashmate or the Gossen Digisix 2 are highly recommended. Both are affordable, portable, and easy to operate. They provide accurate incident readings for both ambient light and flash, making them the perfect stepping stones for those learning the ropes of professional lighting setups and photographic exposure control.