


Understanding basic lighting is one of the most transformative skills you can develop, whether you are a budding photographer, a content creator, a filmmaker, or simply someone who wants to make your home look more inviting. Light shapes how we see the world, how cameras capture reality, and how spaces feel on an emotional level. Despite its importance, lighting remains one of the most overlooked elements in visual work and interior design. This comprehensive guide walks you through everything you need to know about fundamental lighting principles, the types of light sources available, practical techniques you can apply today, and expert recommendations that will elevate your results from amateur to professional. Whether you are working with a single desk lamp or building a full studio setup, mastering the basics of illumination gives you creative control that goes far beyond simply “turning on a light.”
What Is Basic Lighting and Why Does It Matter?
At its core, basic lighting refers to the foundational principles and techniques used to arrange light sources in a scene or environment to achieve a desired visual outcome. This encompasses understanding light direction, intensity, color temperature, diffusion, and shadow control. The concept applies across photography, videography, filmmaking, stage production, architectural design, and everyday home illumination. When you understand how light behaves, you stop guessing and start directing. Every photograph, every video frame, and every room in your home tells a story — and light is the narrator. Poor lighting can make even the most expensive equipment look cheap, while thoughtful placement of a single light source can produce stunning, cinematic results with minimal gear.
The importance of lighting fundamentals extends beyond aesthetics. Proper illumination reduces eye strain in workspaces, enhances mood in living areas, and ensures that critical details are visible in functional environments like kitchens and workshops. In visual media, lighting directly influences viewer perception, emotional response, and even the credibility of the content being presented. Studies in visual psychology consistently show that well-lit images and environments feel more trustworthy, more professional, and more engaging to audiences.
Types of Light Sources You Should Know
Before diving into techniques, it helps to understand the different categories of light sources available for basic lighting setups. Each type has unique characteristics that affect how light interacts with subjects and environments.
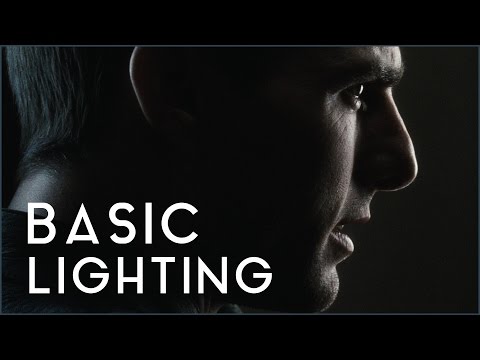
Natural Light

Natural light comes from the sun and is free, abundant, and remarkably versatile. The quality of sunlight changes dramatically throughout the day — soft and diffused during overcast conditions, warm and directional during golden hour, and harsh and high-contrast at midday. Learning to work with natural light is arguably the most important skill in photography and filmmaking. Window light, for instance, acts as a large, soft source that creates gentle shadows and flattering skin tones, making it a favorite for portrait work.
Artificial Light
Artificial light sources include everything from household bulbs to professional studio strobes. Common types include incandescent bulbs, fluorescent tubes, LED panels, and strobe units. LEDs have become the go-to choice for modern creators because they are energy-efficient, produce minimal heat, and offer adjustable color temperature. When building a starter lighting kit, look for LED panels with adjustable brightness and color temperature controls, as they give you the most flexibility for different shooting conditions.
Continuous vs. Strobe Lighting
Continuous lights stay on all the time, making it easy to see how shadows fall and how light wraps around your subject. Strobe or flash lighting delivers a short, powerful burst and is ideal for freezing motion or achieving a specific exposure in bright environments. Both have a place in a well-rounded lighting toolkit, and many professionals use a combination of both depending on the project.
The Three-Point Lighting Technique
The three-point lighting setup is the cornerstone of professional illumination and remains the most widely taught technique in film schools and photography courses. It uses three distinct light positions to sculpt a subject with depth, dimension, and visual interest.
- Key Light — This is the primary light source and the brightest in the setup. It is typically positioned to one side of the subject at roughly a 45-degree angle, creating the main illumination and establishing the overall mood of the scene.
- Fill Light — Placed on the opposite side of the key light, the fill light is softer and less intense. Its purpose is to soften the shadows cast by the key light, reducing contrast and preventing the dark side of the subject from going completely black.
- Back Light (Rim Light) — Positioned behind and above the subject, the back light creates a subtle edge or rim of light that separates the subject from the background. This technique adds depth and a professional, polished look to the image.
Mastering the three-point lighting method gives you a reliable framework that works for portraits, product shots, interviews, and video content. From there, you can experiment by adjusting the relative intensity of each light, changing their positions, or adding additional modifiers.
Essential Lighting Qualities Every Beginner Should Understand
Not all light is created equal. The quality of light — how hard or soft it appears — plays a huge role in the final result of any image or scene.
- Hard Light — Produced by a small, direct light source, hard light creates sharp, well-defined shadows and high contrast. It is dramatic and adds texture, making it popular for fitness photography, edgy portraits, and noir-style cinematography.
- Soft Light — Created by a large light source relative to the subject or by using diffusion materials, soft light produces gradual shadow transitions and gentle highlights. It is flattering for portraits and product photography, reducing the appearance of skin imperfections and surface blemishes.
- Color Temperature — Measured in Kelvin (K), color temperature determines whether light appears warm (yellow/orange, around 2700K–3500K) or cool (blue, around 5500K–6500K). Mixing different color temperatures in a single scene without correction leads to unpleasant color casts and unprofessional-looking results.
- Direction — Where the light comes from dramatically changes the mood. Front lighting flattens the subject, side lighting adds drama and texture, and back lighting creates silhouettes and separation.
Lighting Modifiers and Their Effects
Modifiers are tools that shape and control how light behaves. The most common include softboxes, umbrellas, reflectors, diffusers, barn doors, and gels. A softbox transforms a hard light source into a large, even panel of soft light. A reflector bounces existing light back onto a shadowed area, functioning as a zero-cost fill light. Understanding what each modifier does allows you to shape light precisely rather than relying on the raw output of a bare bulb or bare flash head.
Lighting Setups for Different Environments
The ideal basic lighting arrangement depends heavily on the environment and the goal of the shoot or the room’s function.
Home Studio for Photography and Video
A simple home studio setup can be built with just two LED panels and a reflector. Position one panel as the key light at a 45-degree angle to the subject, place the second panel on the opposite side as the fill light at reduced power, and use a white wall or a basic reflector to bounce light back toward the shadow side. This setup is affordable, versatile, and covers the vast majority of portrait, product, and talking-head video scenarios.
Interior Home Lighting Design
When lighting a room for aesthetics and comfort, layering is essential. Ambient lighting provides overall illumination through ceiling fixtures or recessed lights. Task lighting focuses light where it is needed most — desk lamps for reading, under-cabinet lights in kitchens. Accent lighting highlights architectural features, artwork, or decorative objects. Combining these three layers creates a balanced, visually rich environment that feels intentional and designed rather than flat and generic.
Outdoor Natural Light Photography
Outdoor photographers rely heavily on the sun as their key light. The best times for outdoor shoots are early morning and late afternoon, when the sun sits low and produces warm, directional light with long, soft shadows. Midday sun is harsh and unflattering, but a simple diffusion panel or even a white bedsheet stretched between two poles can transform direct sunlight into soft, wraparound illumination.
Common Mistakes to Avoid in Basic Lighting
Even experienced creators occasionally fall into lighting traps. Here are some of the most common mistakes that undermine lighting quality in both indoor and outdoor settings.
- Relying entirely on overhead ceiling lights, which create unflattering shadows under the eyes and nose.
- Ignoring the color temperature of mixed light sources, leading to inconsistent white balance in post-production.
- Placing the light source too close to the subject without diffusion, resulting in harsh, unflattering shadows.
- Neglecting the background, which can look distracting or muddy if it is not properly lit or intentionally left dark.
- Using too many light sources without a clear hierarchy, creating a flat, confusing image with no focal point.
Quick Reference: Lighting Terms and Definitions
| Term | Definition |
| Key Light | The primary and brightest light source in a setup |
| Fill Light | A secondary light that reduces shadow contrast |
| Rim Light | A backlight that creates an edge highlight on the subject |
| Color Temperature | Measured in Kelvin; describes the warmth or coolness of light |
| Diffusion | A material or technique that scatters light to soften it |
| High-Key Lighting | A bright, low-contrast style with minimal shadows |
| Low-Key Lighting | A dramatic style with deep shadows and high contrast |
| Ambient Light | Existing light in an environment before any added sources |
Expert Tips to Improve Your Lighting Instantly
- Observe natural light first. Spend time noticing how sunlight enters a room, how shadows fall on different surfaces, and how the quality of light changes through the day. This observation builds the instincts you need to recreate and control artificial light.
- Invest in one quality modifier. A single softbox or a collapsible reflector can dramatically improve the quality of any light source, whether it is a studio strobe or a simple desk lamp.
- Use the inverse square law to your advantage. Light falls off rapidly as distance increases. Moving your light source closer to the subject not only increases intensity but also creates a more even, flattering light across the subject.
- Shoot during golden hour. The hour after sunrise and before sunset provides warm, directional light that is universally flattering for portraits and landscapes alike.
- Always check your background. A well-lit subject sitting against a poorly lit or overly bright background draws attention to the imbalance. Balance the background illumination with the subject lighting for a cohesive result.
Conclusion
Mastering basic lighting is not about owning expensive equipment or having a dedicated studio space. It is about understanding how light works, how it interacts with subjects and surfaces, and how small adjustments in position, intensity, and quality can completely transform a result. From the three-point lighting technique to the strategic use of natural window light, every principle covered in this guide is designed to give you immediate, practical value. Start with one light source, experiment with placement, observe the results, and build from there. The most important step in your lighting journey is the very first one — turning on a light and paying attention to what it does. The more you practice, the more intuitive and instinctive your lighting decisions become, and the more creative freedom you unlock in every project you undertake.
Frequently Asked Questions
What is the easiest basic lighting setup for beginners?
The easiest beginner lighting setup involves a single light source — such as a window, a desk lamp, or an LED panel — positioned at a 45-degree angle to the subject. Add a white poster board or reflector on the opposite side to bounce light back into the shadows. This one-plus-one approach gives you the key light and a fill source without any complexity or additional cost.
What color temperature is best for basic indoor lighting?
For most indoor applications, a color temperature between 3500K and 4500K produces a neutral, natural-looking light that works well for both photography and everyday living. Warm tones around 2700K–3000K create a cozy, inviting atmosphere for living rooms and bedrooms, while cooler temperatures around 5000K–6500K simulate daylight and are ideal for task-oriented spaces like home offices and workshops.
How can I improve my lighting without buying new equipment?
The most effective no-cost lighting improvement is repositioning your existing light source. Move it higher, angle it to the side, or place a white sheet or translucent curtain in front of it to diffuse the light. Rearranging furniture to take advantage of natural window light can also have a dramatic impact. Even painting a wall white or adding a reflective surface near your subject can significantly improve the quality of available light.
What is the difference between ambient lighting and basic lighting?
Ambient lighting refers to the existing, uncontrolled light present in an environment — such as sunlight through a window or the overhead fixtures already installed in a room. Basic lighting involves the intentional arrangement and control of light sources, whether natural or artificial, to achieve a specific visual goal. Ambient light becomes basic lighting the moment you start modifying, supplementing, or directing it with purpose.
Why does my video lighting look flat and uninteresting?
Flat lighting typically occurs when the primary light source is directly in front of the subject with no shadow or depth variation. This happens when using harsh overhead lights or placing a softbox directly facing the camera. To add dimension, move your key light to the side, introduce a fill light at reduced intensity, and add a back light or rim light to create separation between the subject and the background. The goal is to control shadow placement, not eliminate shadows entirely.